Installer Setup Hub
Everything You Need to
Install GatEvo
On Site.
Video walkthroughs, downloadable PDF guides, and an interactive step-by-step app setup — all in one place for professional installers.
From first Bluetooth pairing to cloud control and 4G activation — follow the guides below or jump straight to the interactive quick guide.
Video Guides
Watch Before You Install
Professional walkthroughs covering installation, wiring safety, and cloud setup — watch on-site or share with your team.
Downloadable Resources
Installer Documentation
Download official PDF guides for on-site reference, team training, or customer handover packs.
Installer Quick Guide
Step-by-step app setup from creating a site to enabling cloud control on any GatEvo device.
Safety & Wiring Guide
Essential wiring diagrams, safety requirements, and compliance notes for professional installers.
4G SIM Activation Guide
How to activate and configure cellular connectivity for GatEvo Connect 4G units.
Interactive Guide
App Setup
Step by Step.
Follow each step on your phone. Use the arrows, tap a step number, or swipe on mobile.
1 / 12
Step 01
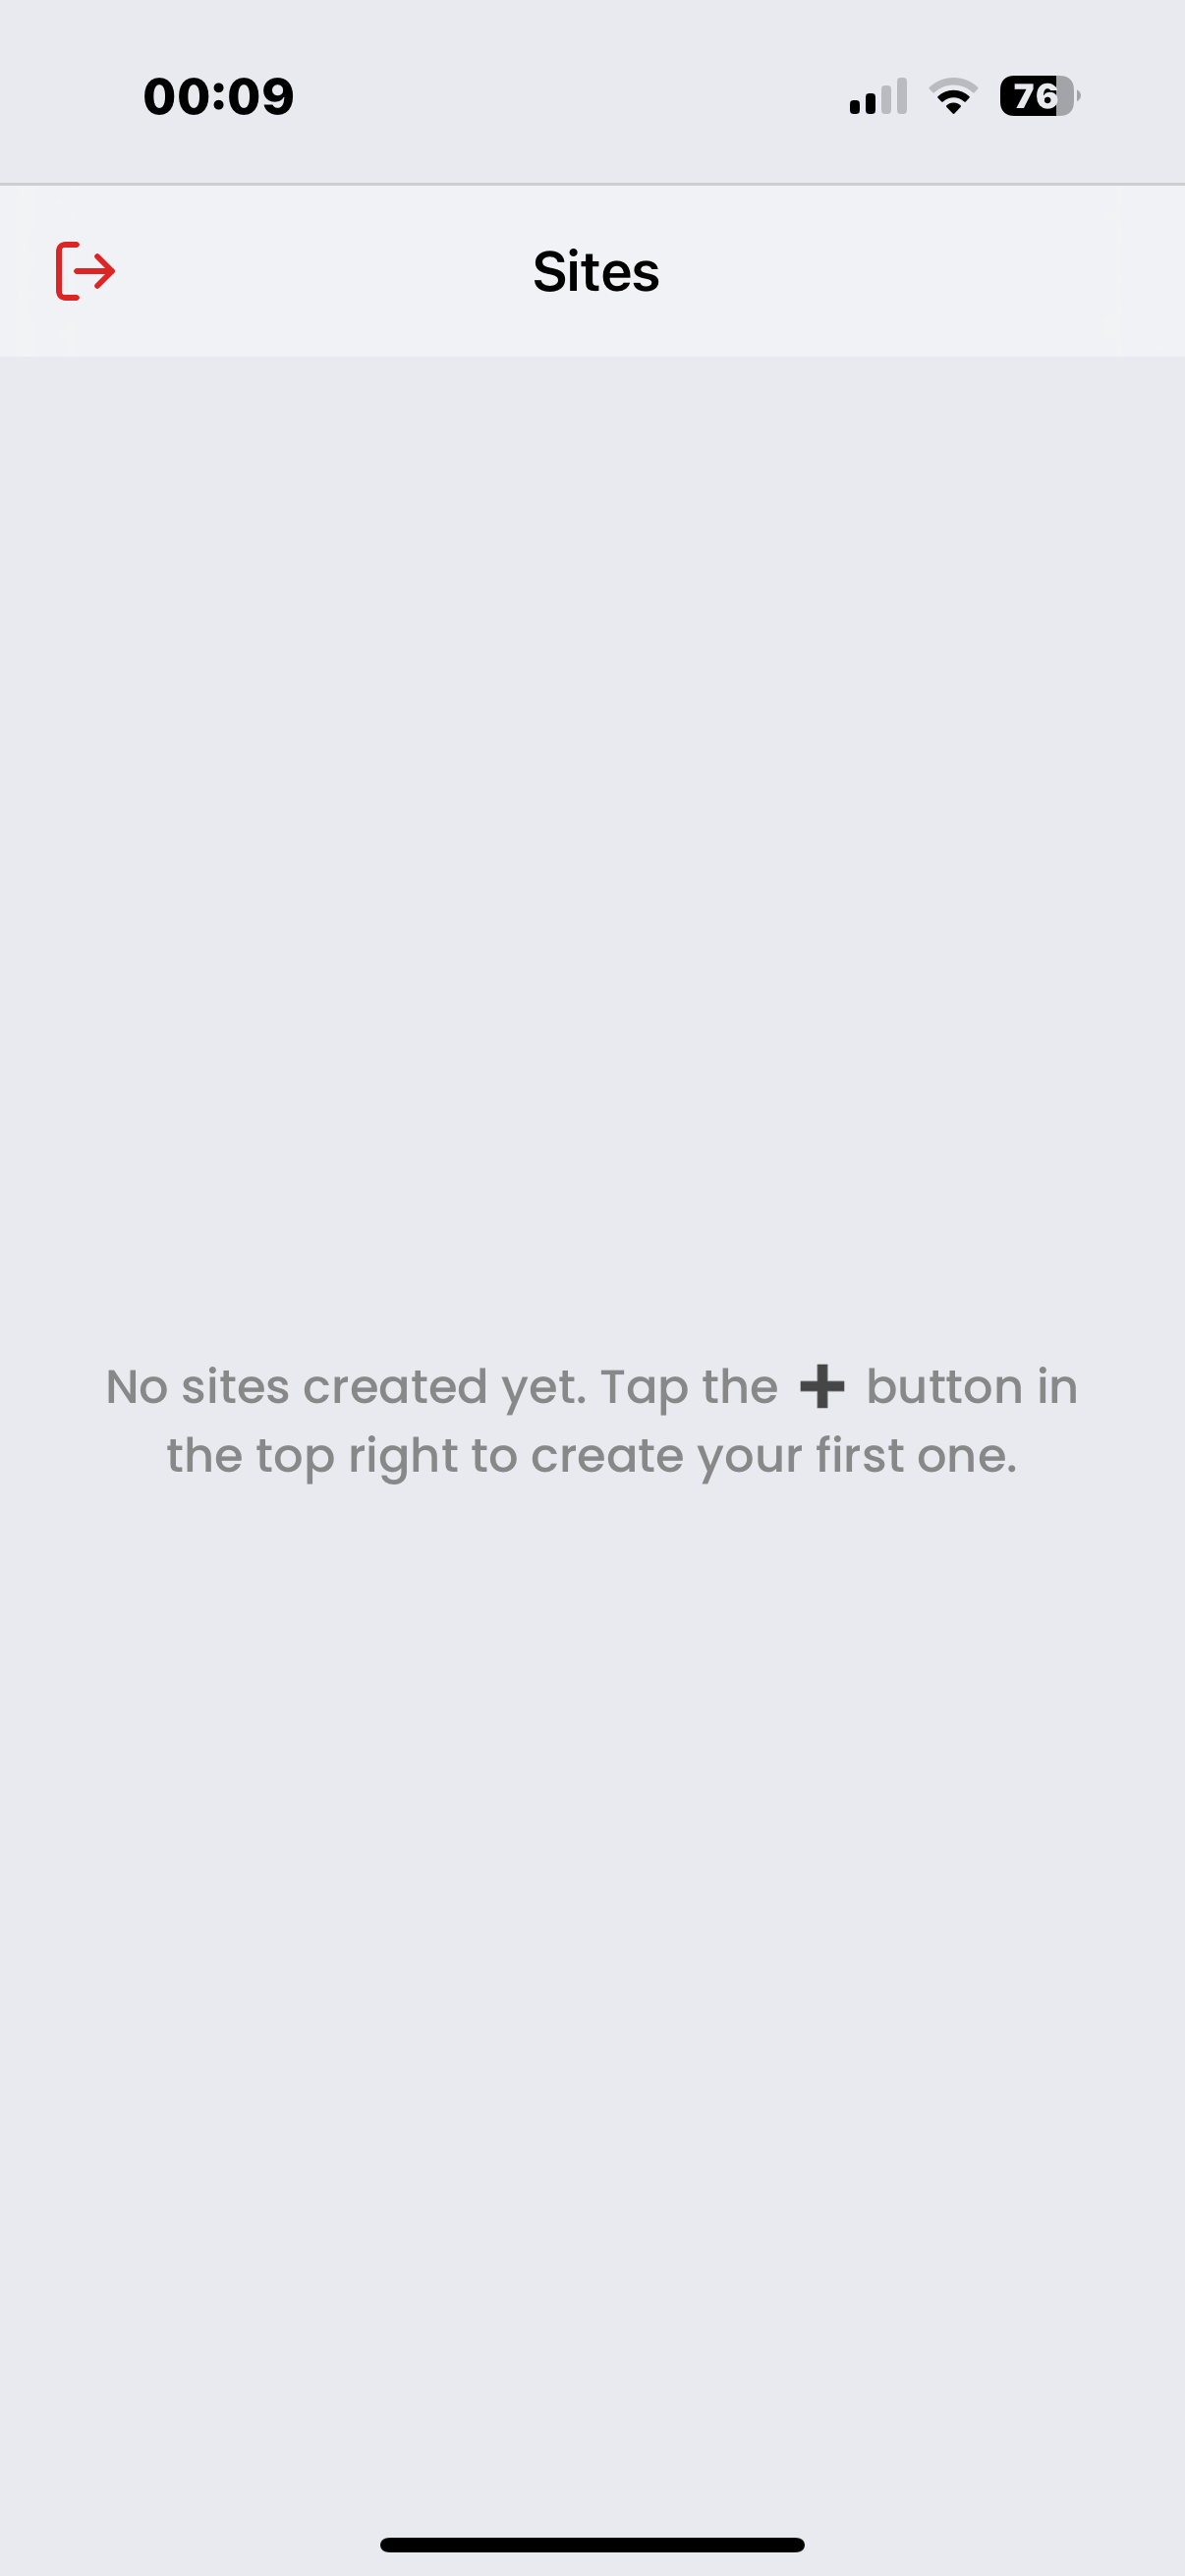
Create a New Site
Step 01
Create a New Site
- Open the GatEvo App on your iPhone
- Tap + (top-right) on the Sites screen
- Enter a Site Name (e.g., customer name or location)
- Tap Save and open the newly created site
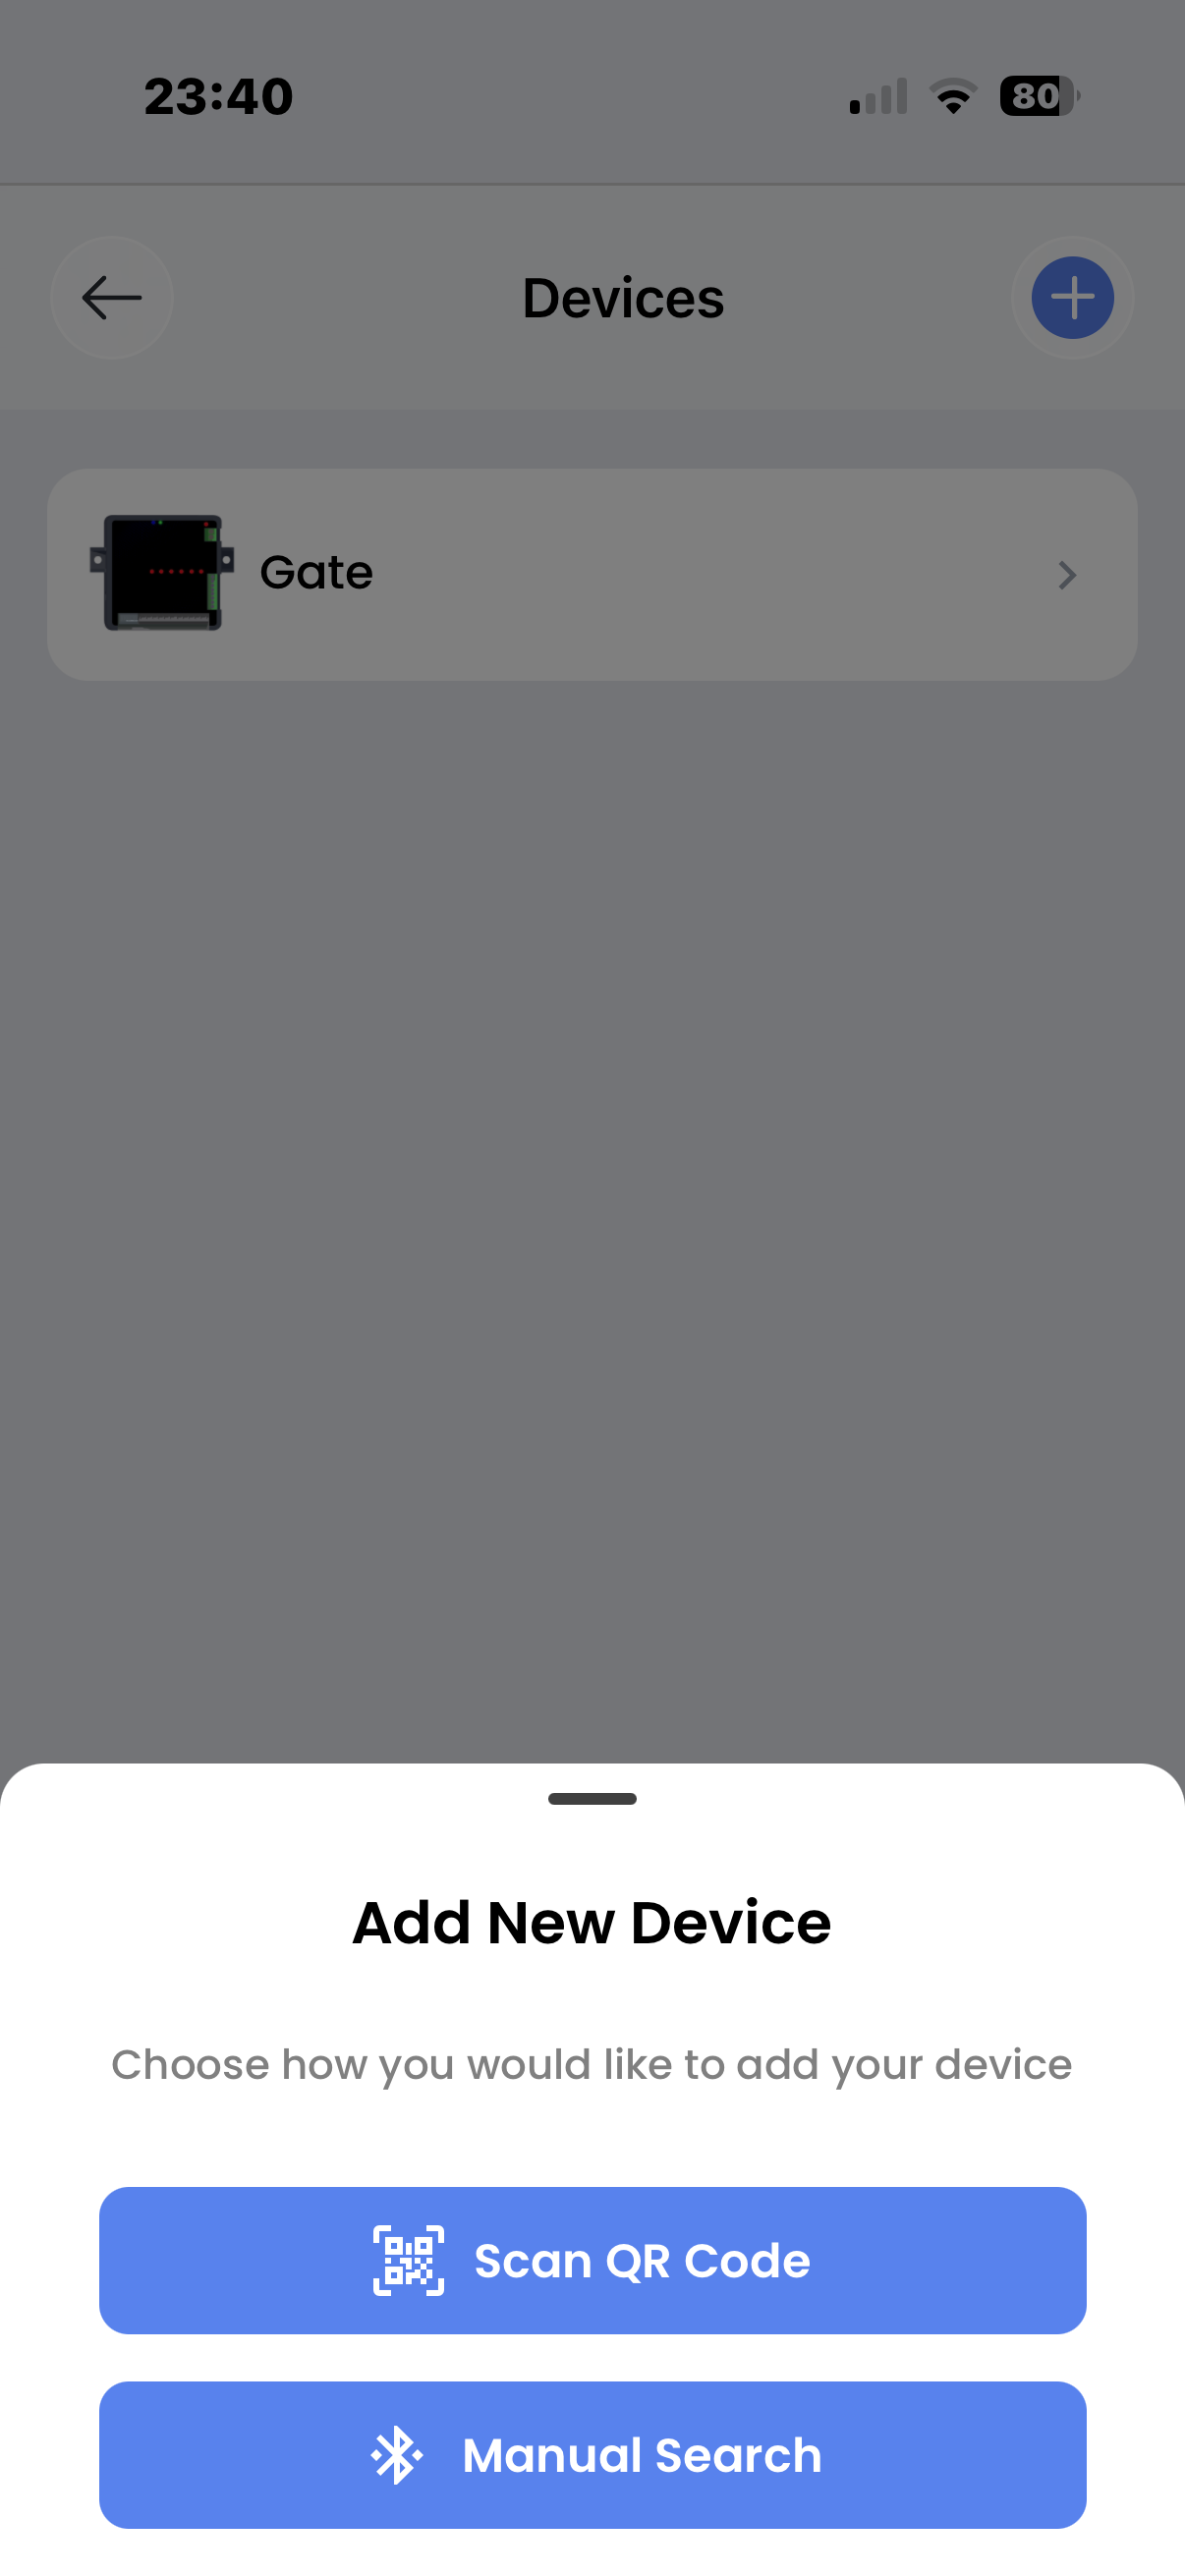
Step 02
Add a Device
- Go to Devices inside the site
- Tap the + button (top-right)
- Select Manual Search
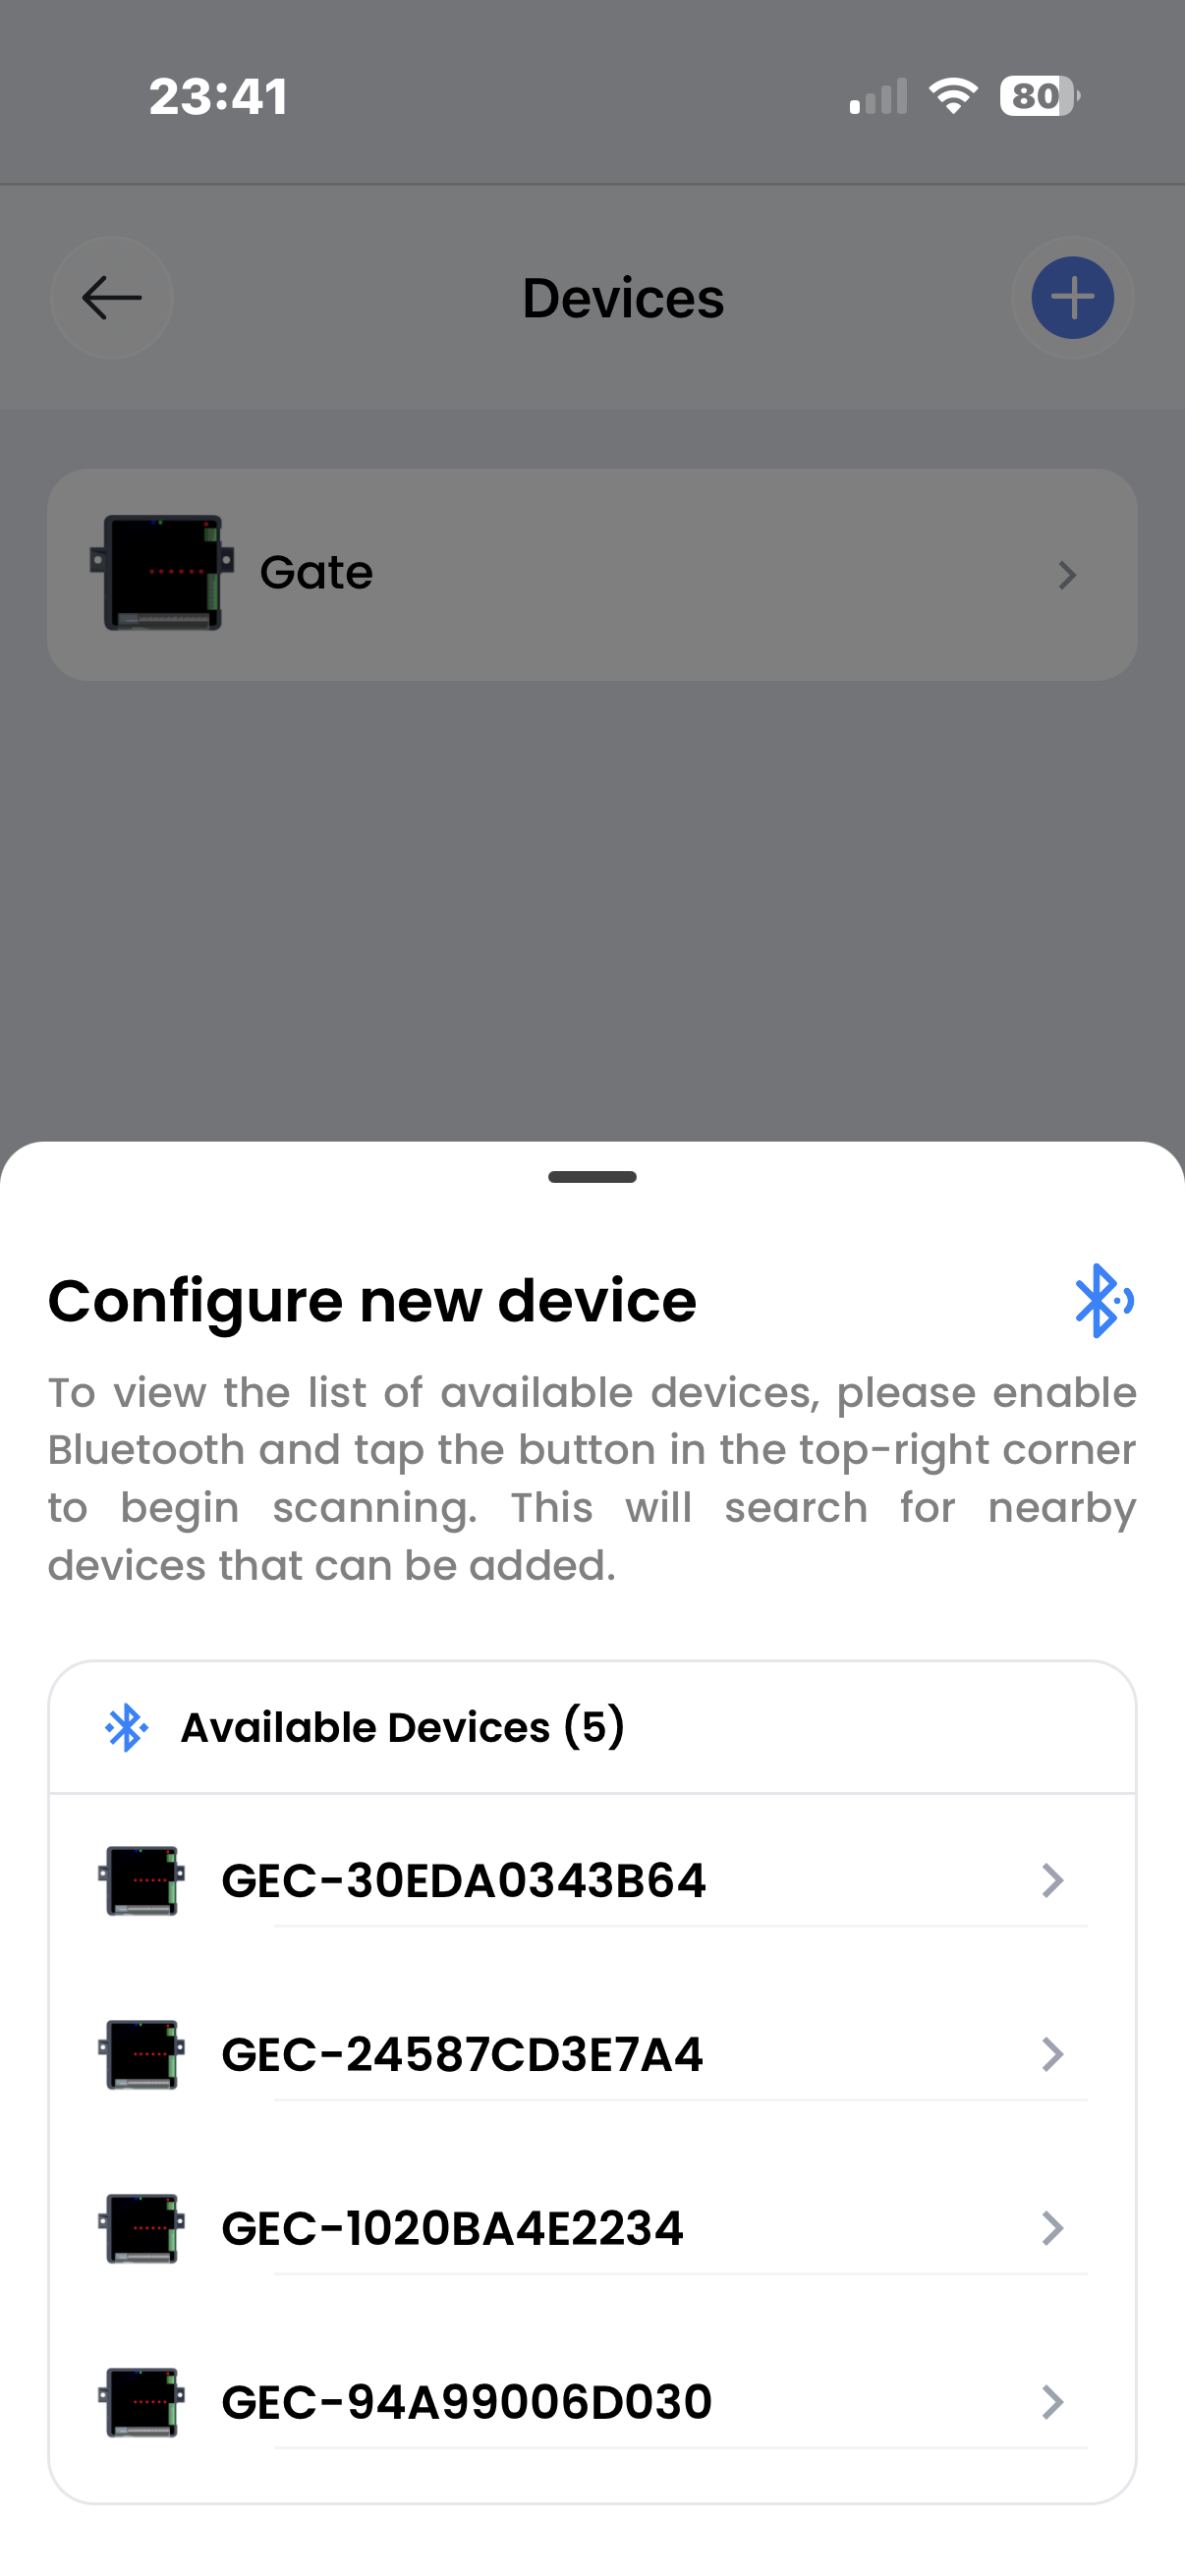
Step 03
Search and Select Device (BLE)
- Ensure the GatEvo unit is powered ON
- Enable Bluetooth on your phone
- Match the Serial Number with the label on the unit
- Tap the correct device from the list
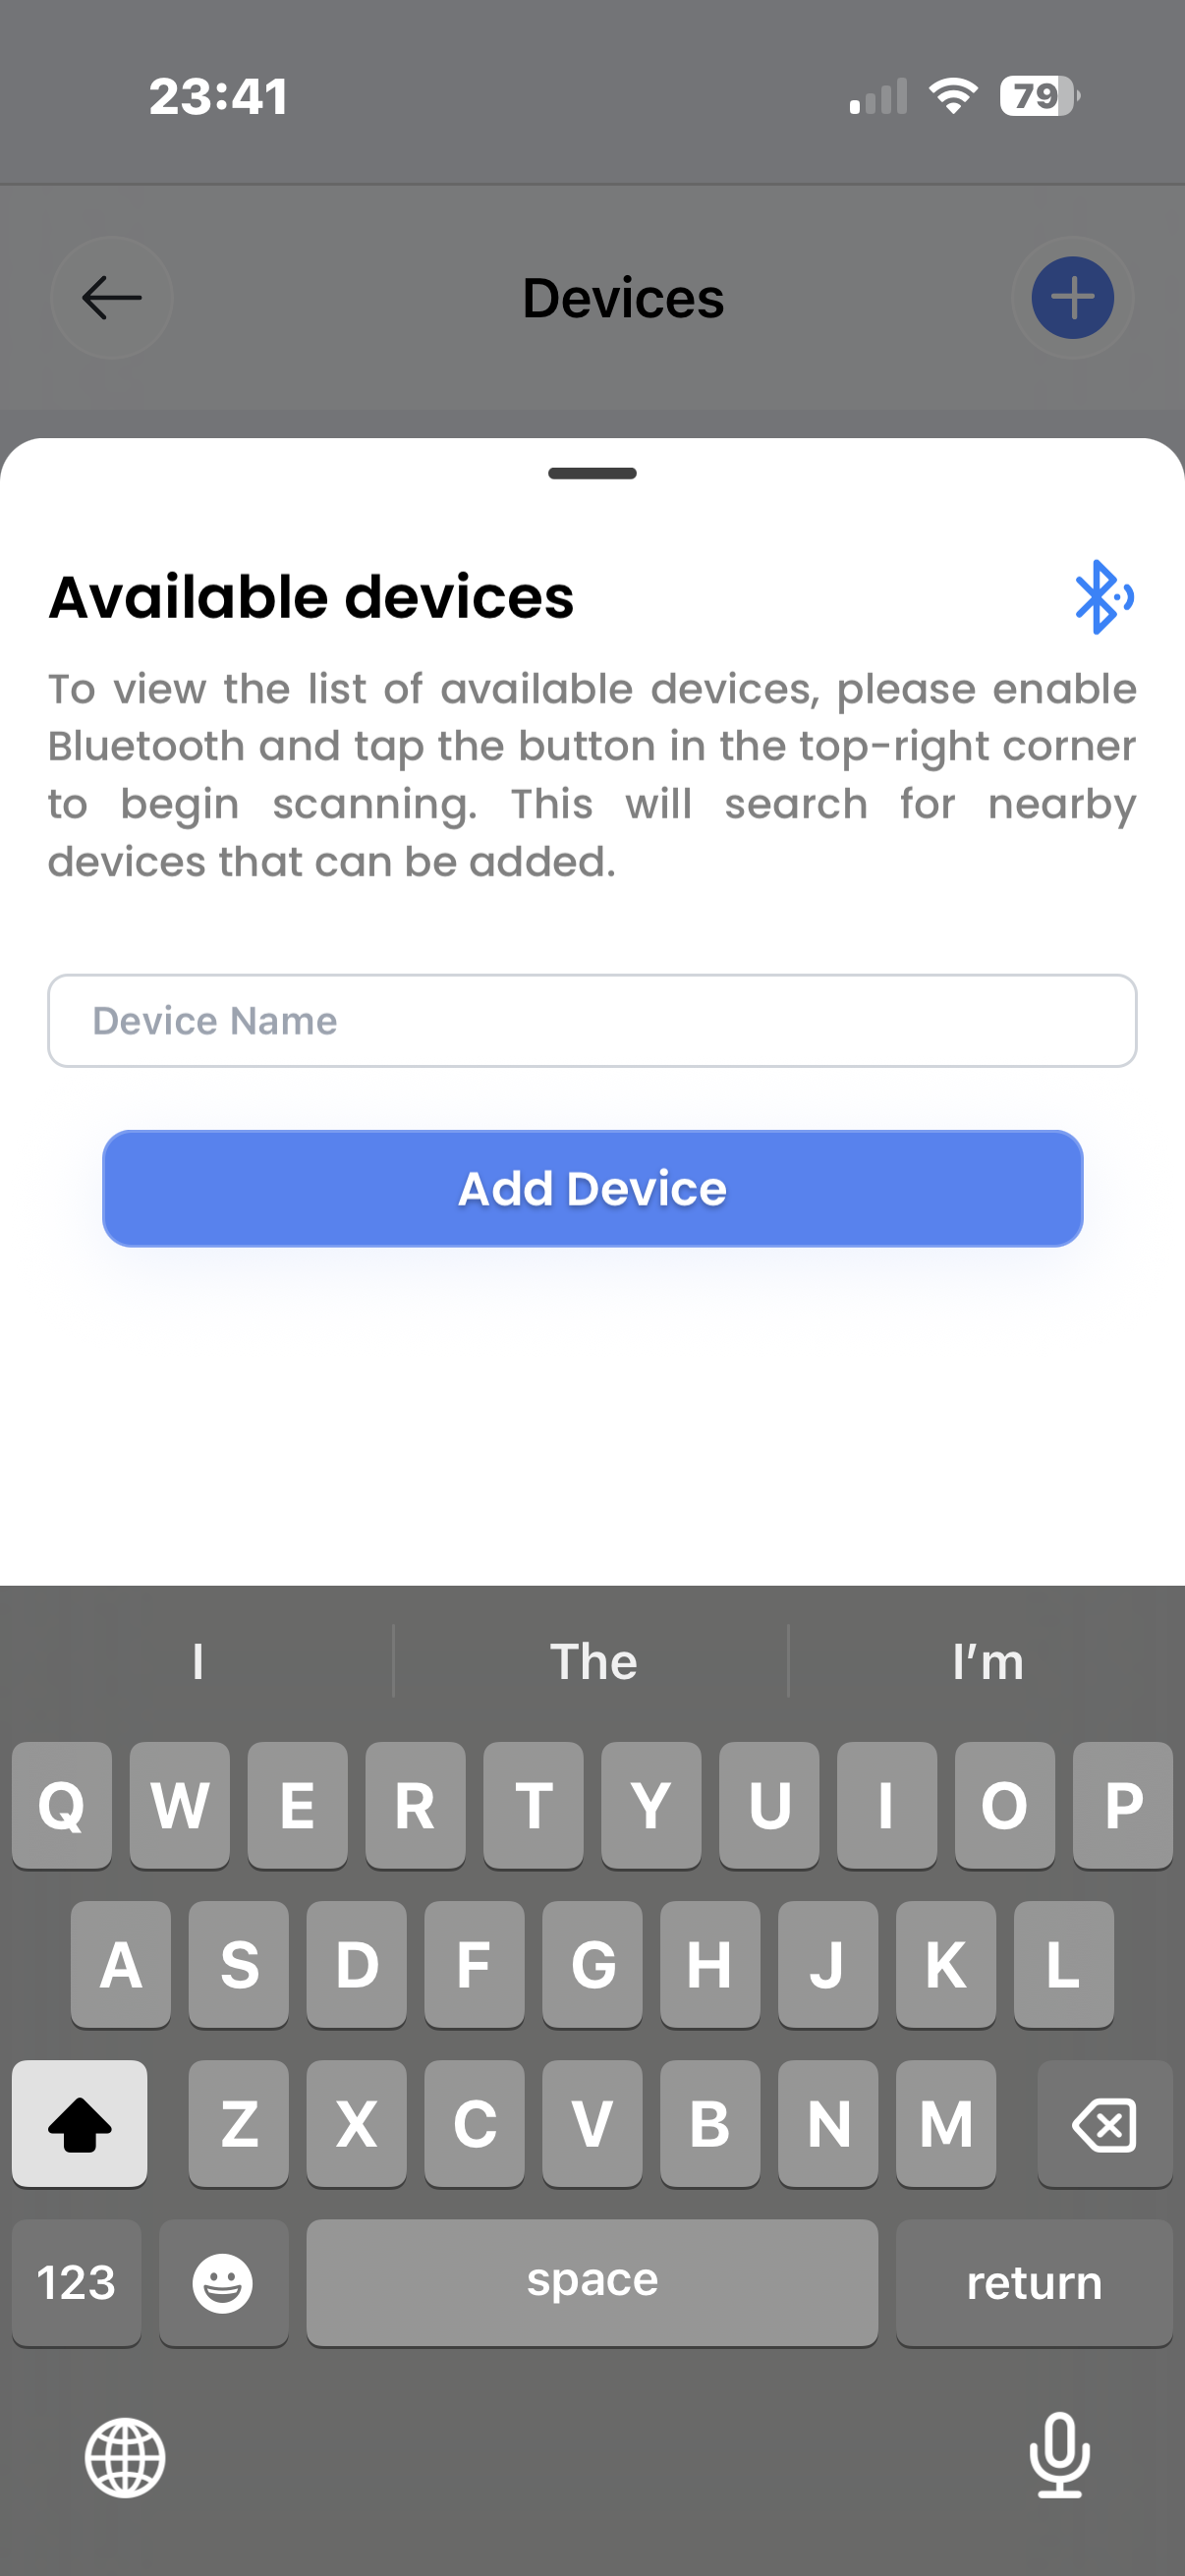
Step 04
Name the Device
- Enter a clear device name
- e.g., Main Gate, Sliding Gate, Door, Barrier
- Tap Add Device to confirm
Step 05
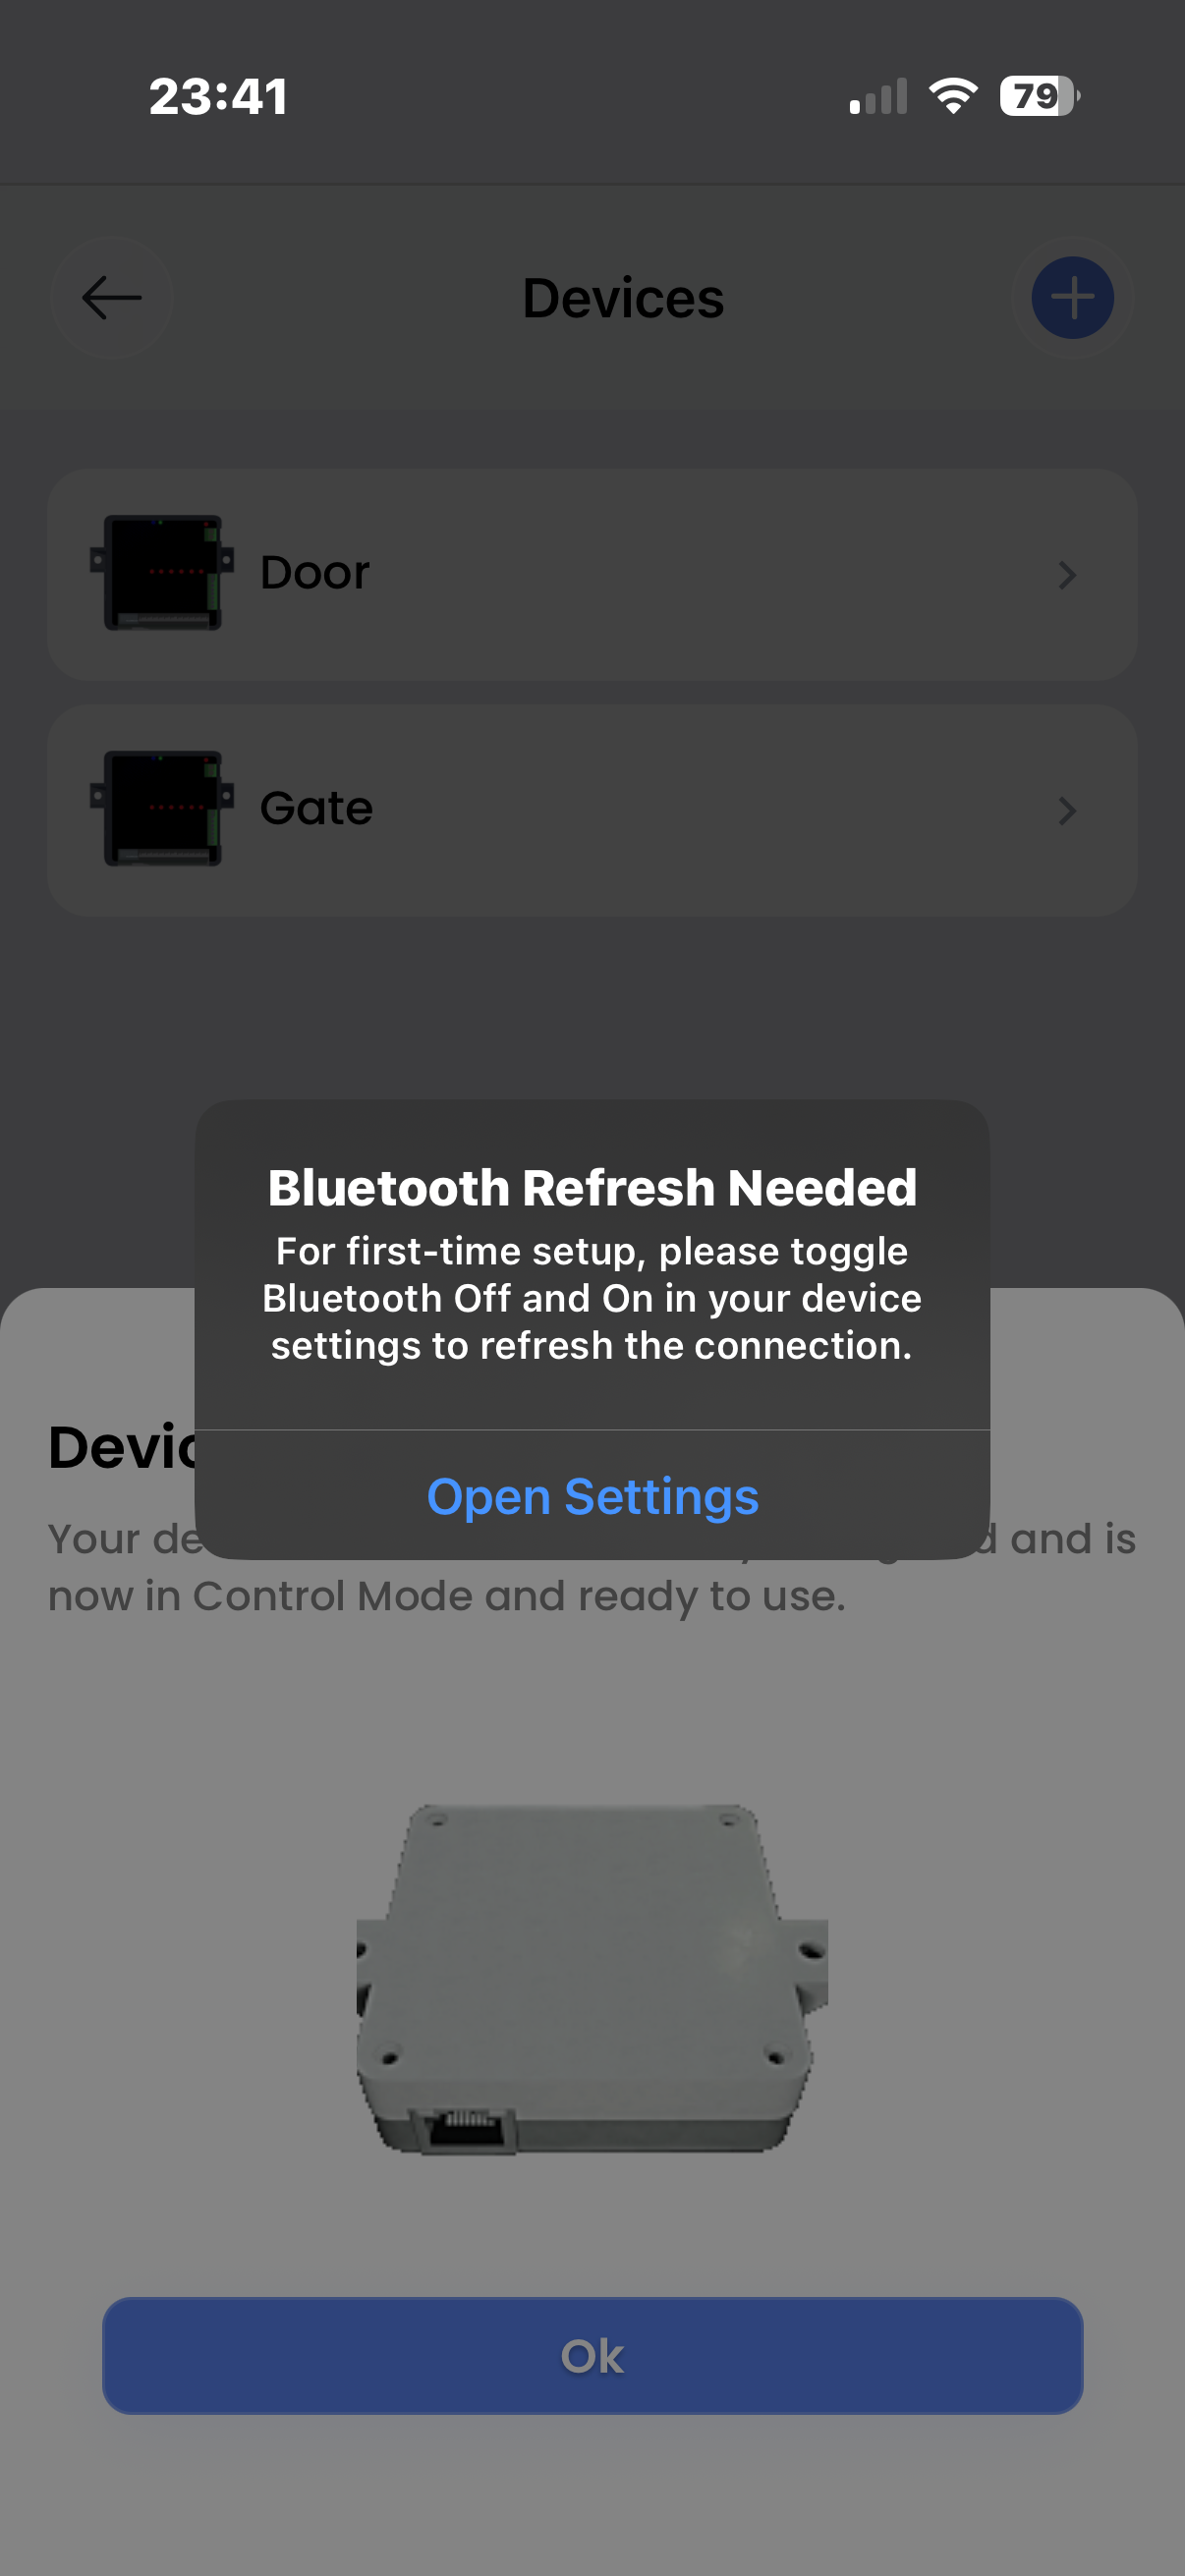
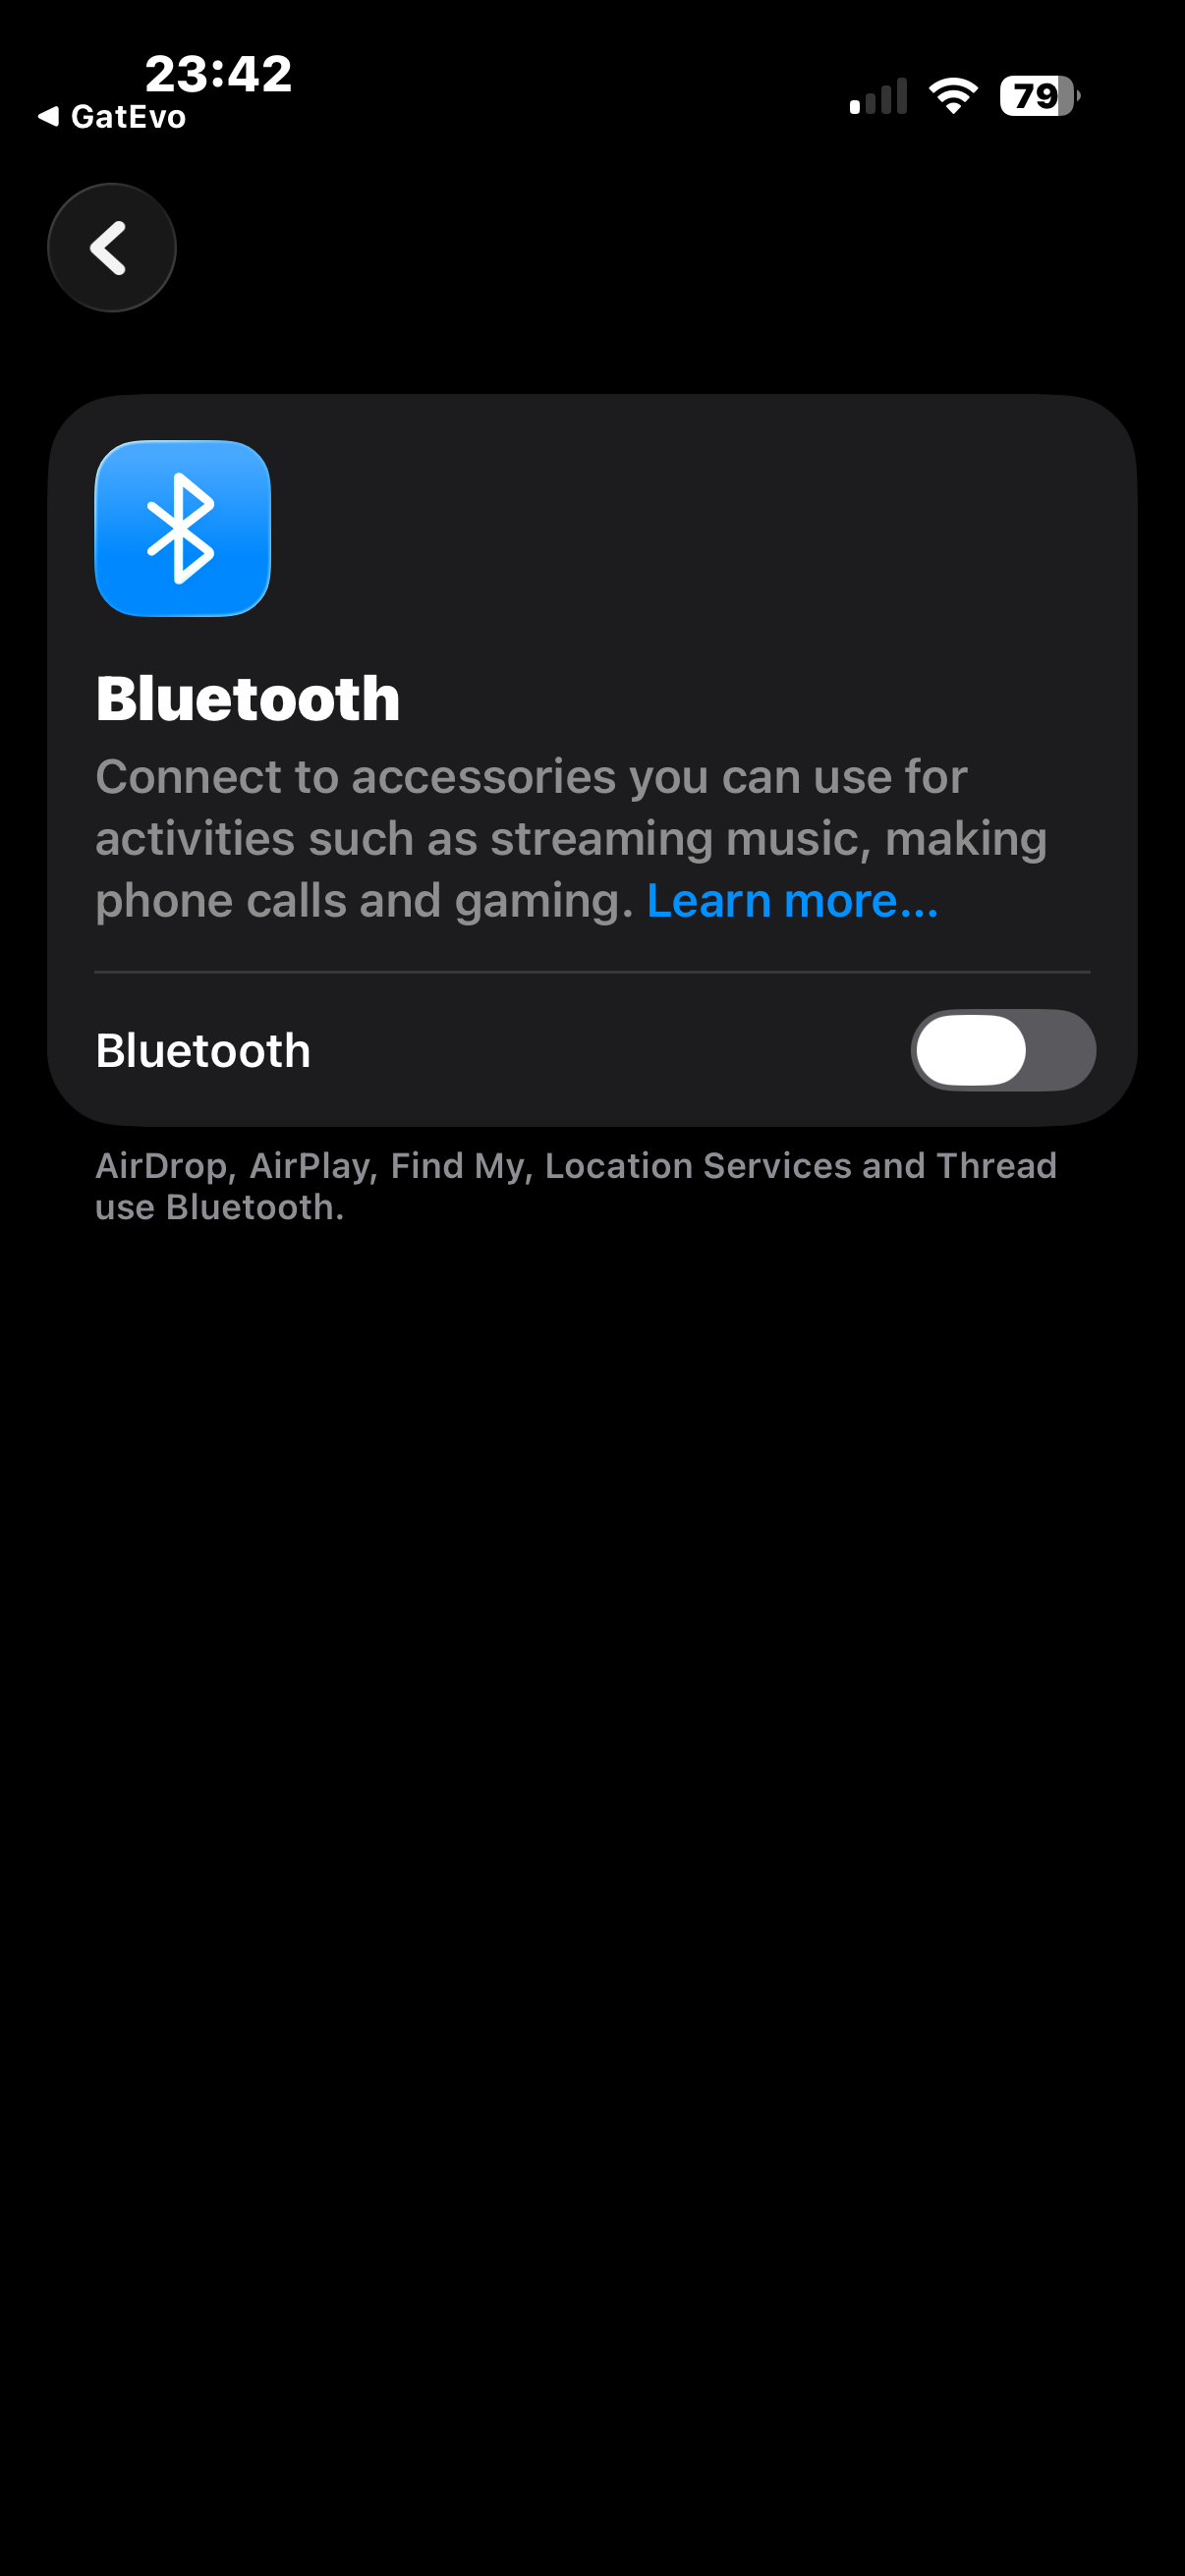
CRITICAL: Refresh Bluetooth (iPhone Only)
Use iPhone Settings → Bluetooth to toggle — NOT Control Center. Control Center only pauses scanning and will not fully reset the Bluetooth stack.
- Tap "Open Settings" when prompted
- In iPhone Settings → Bluetooth: turn OFF
- Wait 2–3 seconds, then turn Bluetooth back ON
- Return to the GatEvo App
Step 06
Return to App After Bluetooth Refresh
- After toggling Bluetooth OFF/ON in Settings, return to the app
- The app will now establish a proper Bluetooth connection
- Required for the iOS Bluetooth stack to work correctly
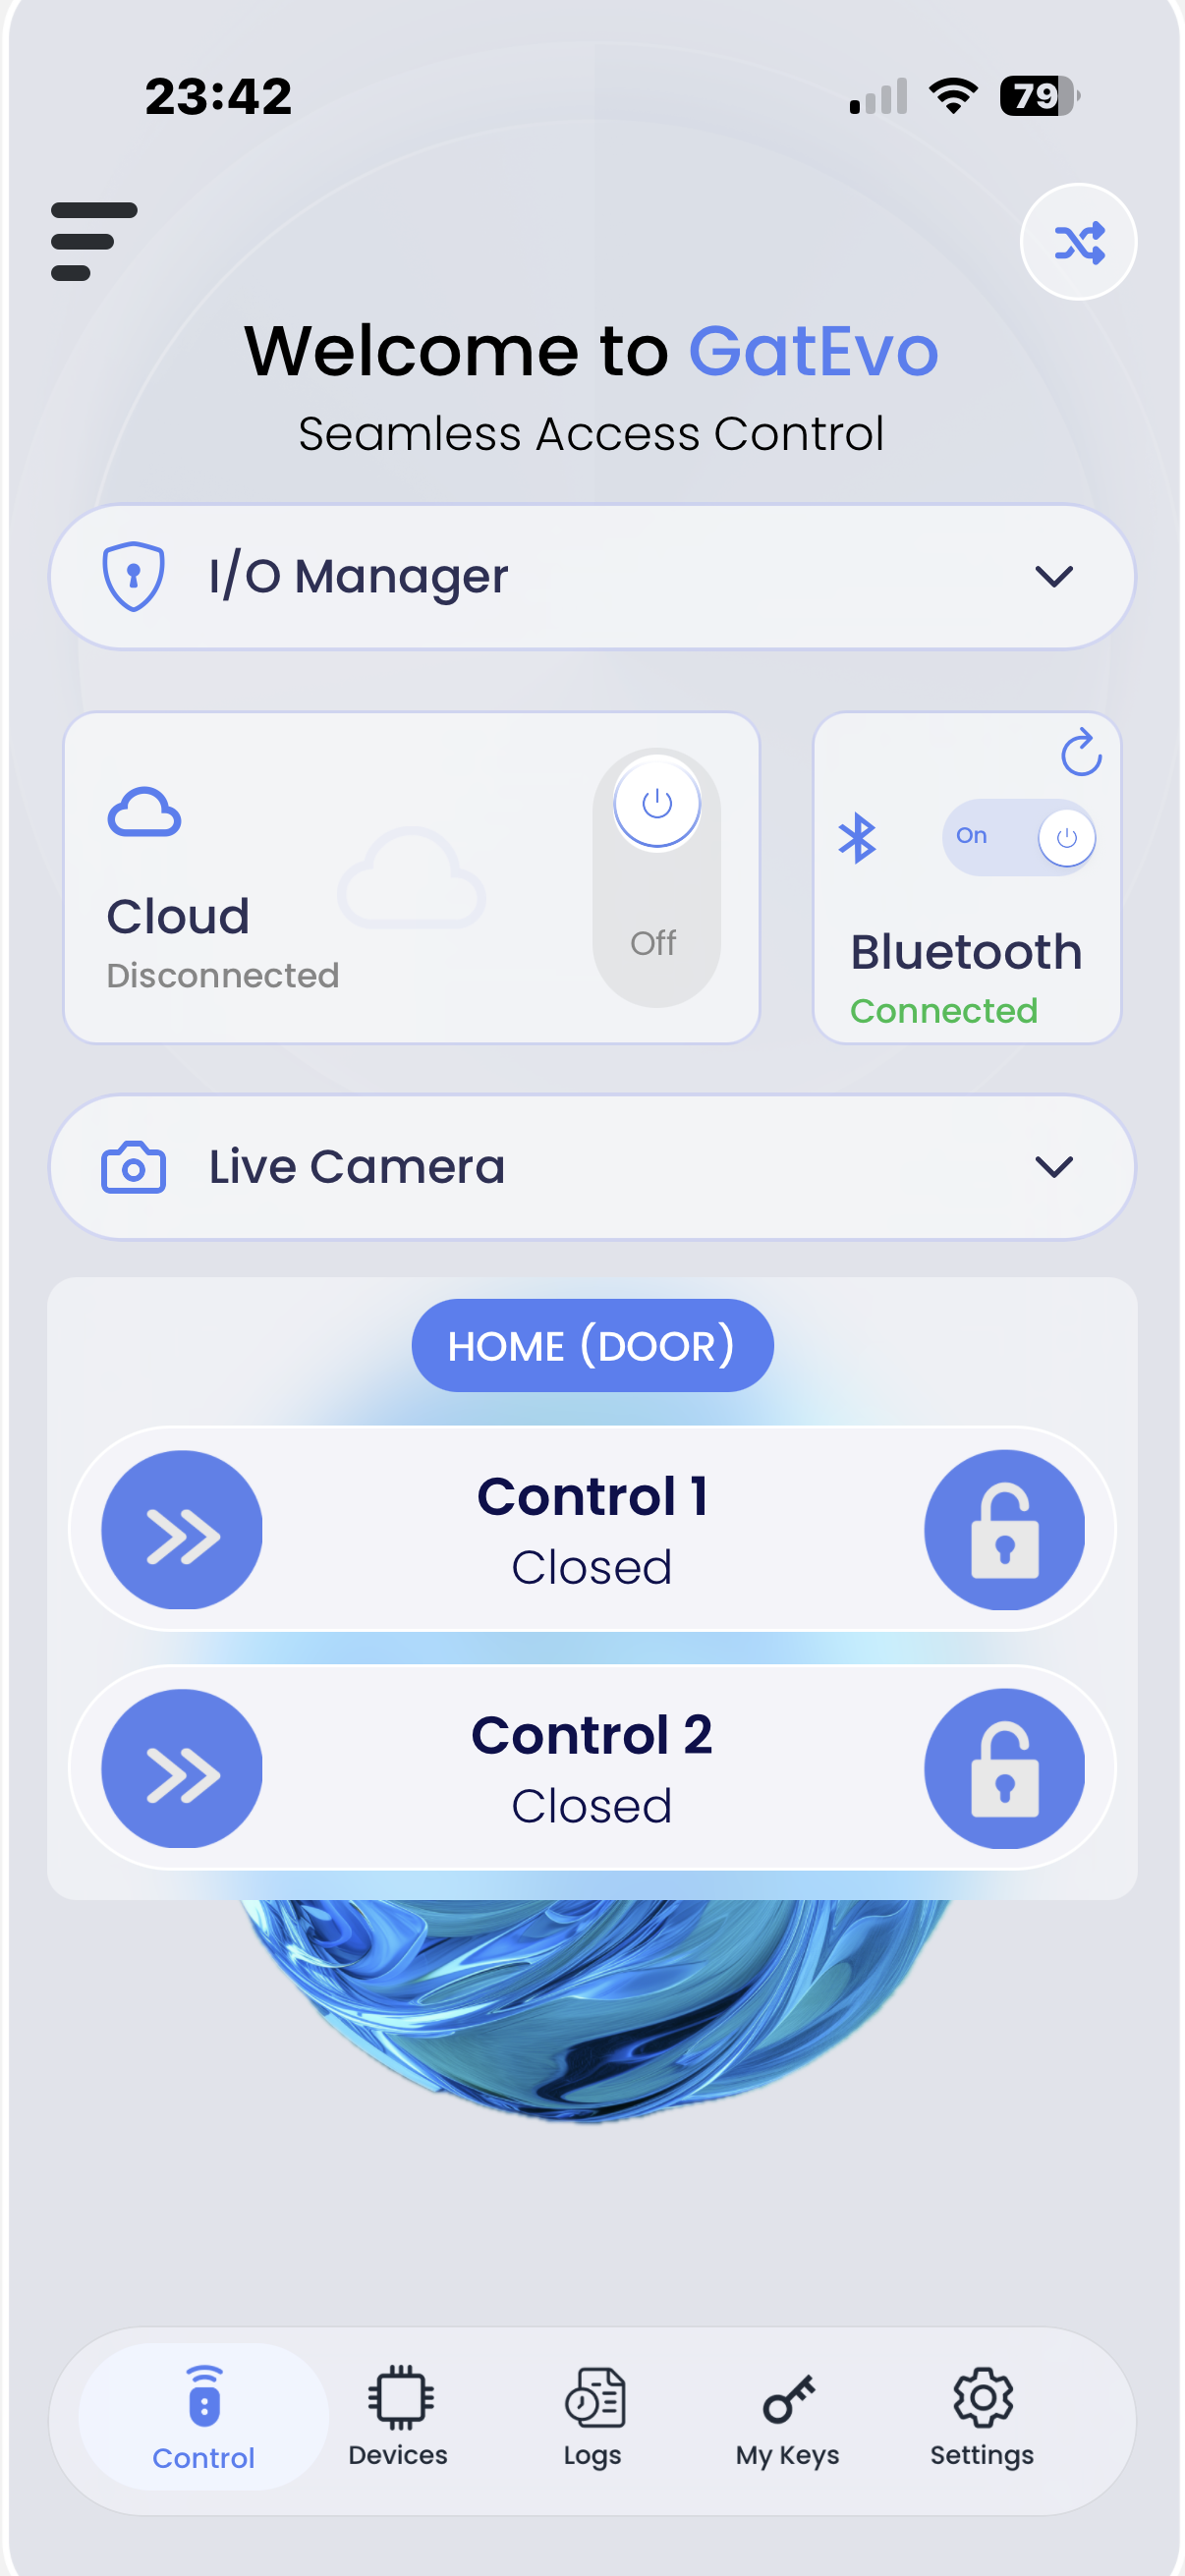
Step 07
Test Bluetooth Control
- Confirm Bluetooth shows Connected on the Control screen
- If disconnected, tap the Bluetooth panel to reconnect
- Swipe the Control buttons to send triggers
- Confirm the gate/door responds properly
Step 08
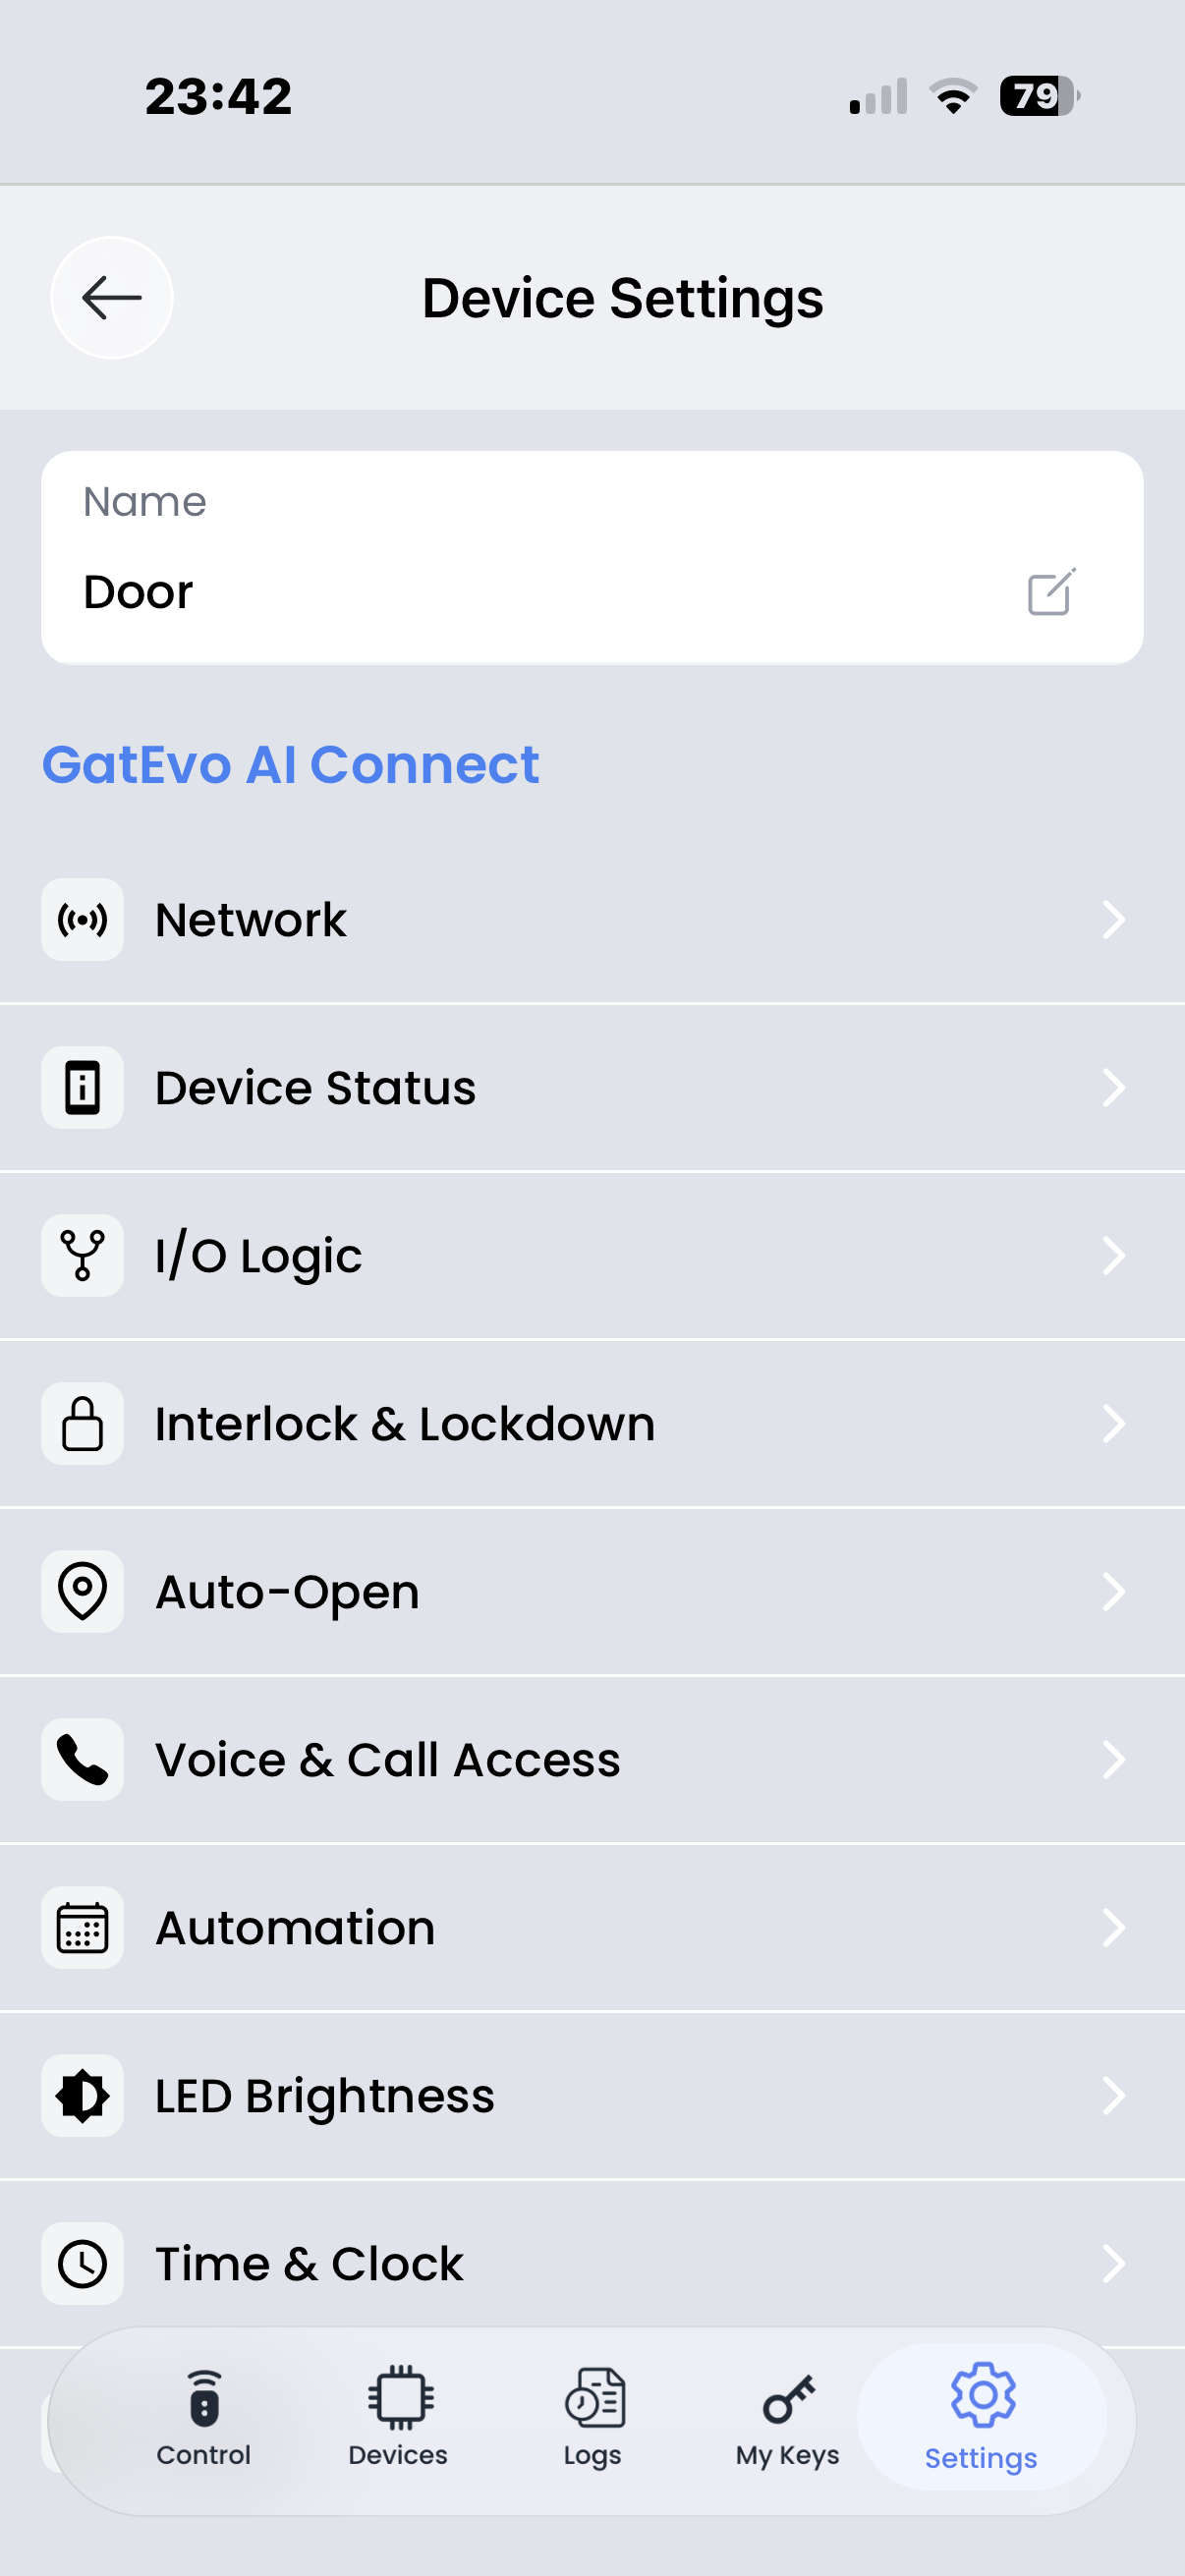
Open Device Settings
- Tap Settings on the bottom menu bar
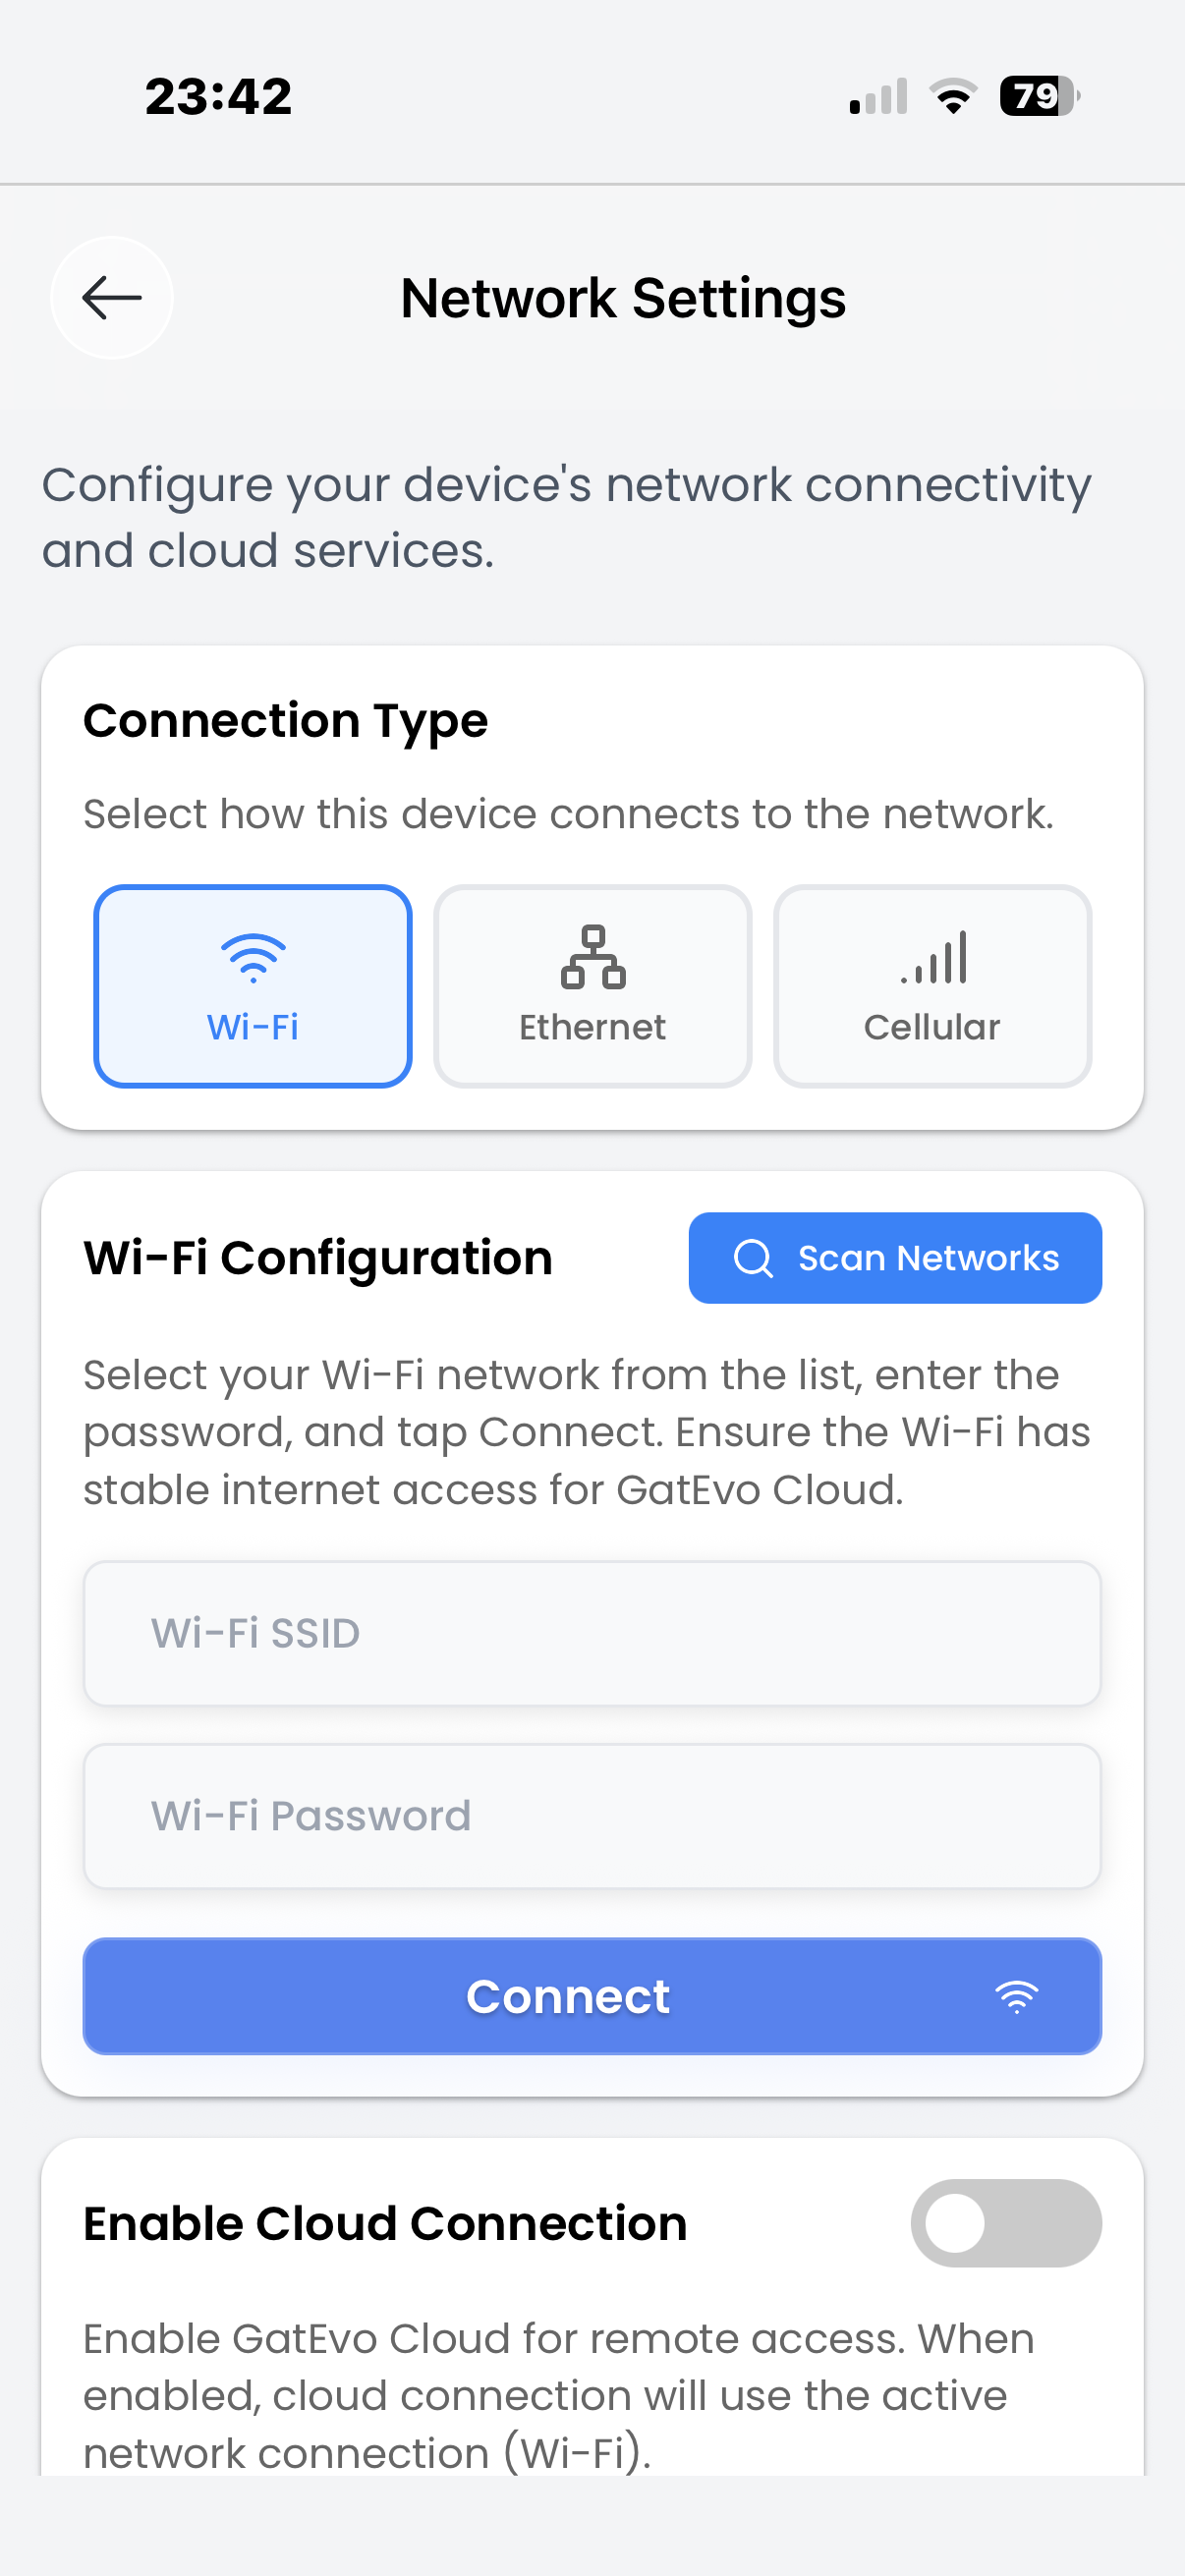
- Select Network settings to proceed
Step 09
Select Connection Type & Scan Networks
- Choose connection type: Wi-Fi / Ethernet / Cellular
- For Wi-Fi: select the Wi-Fi option
- Tap Scan Networks to find available networks
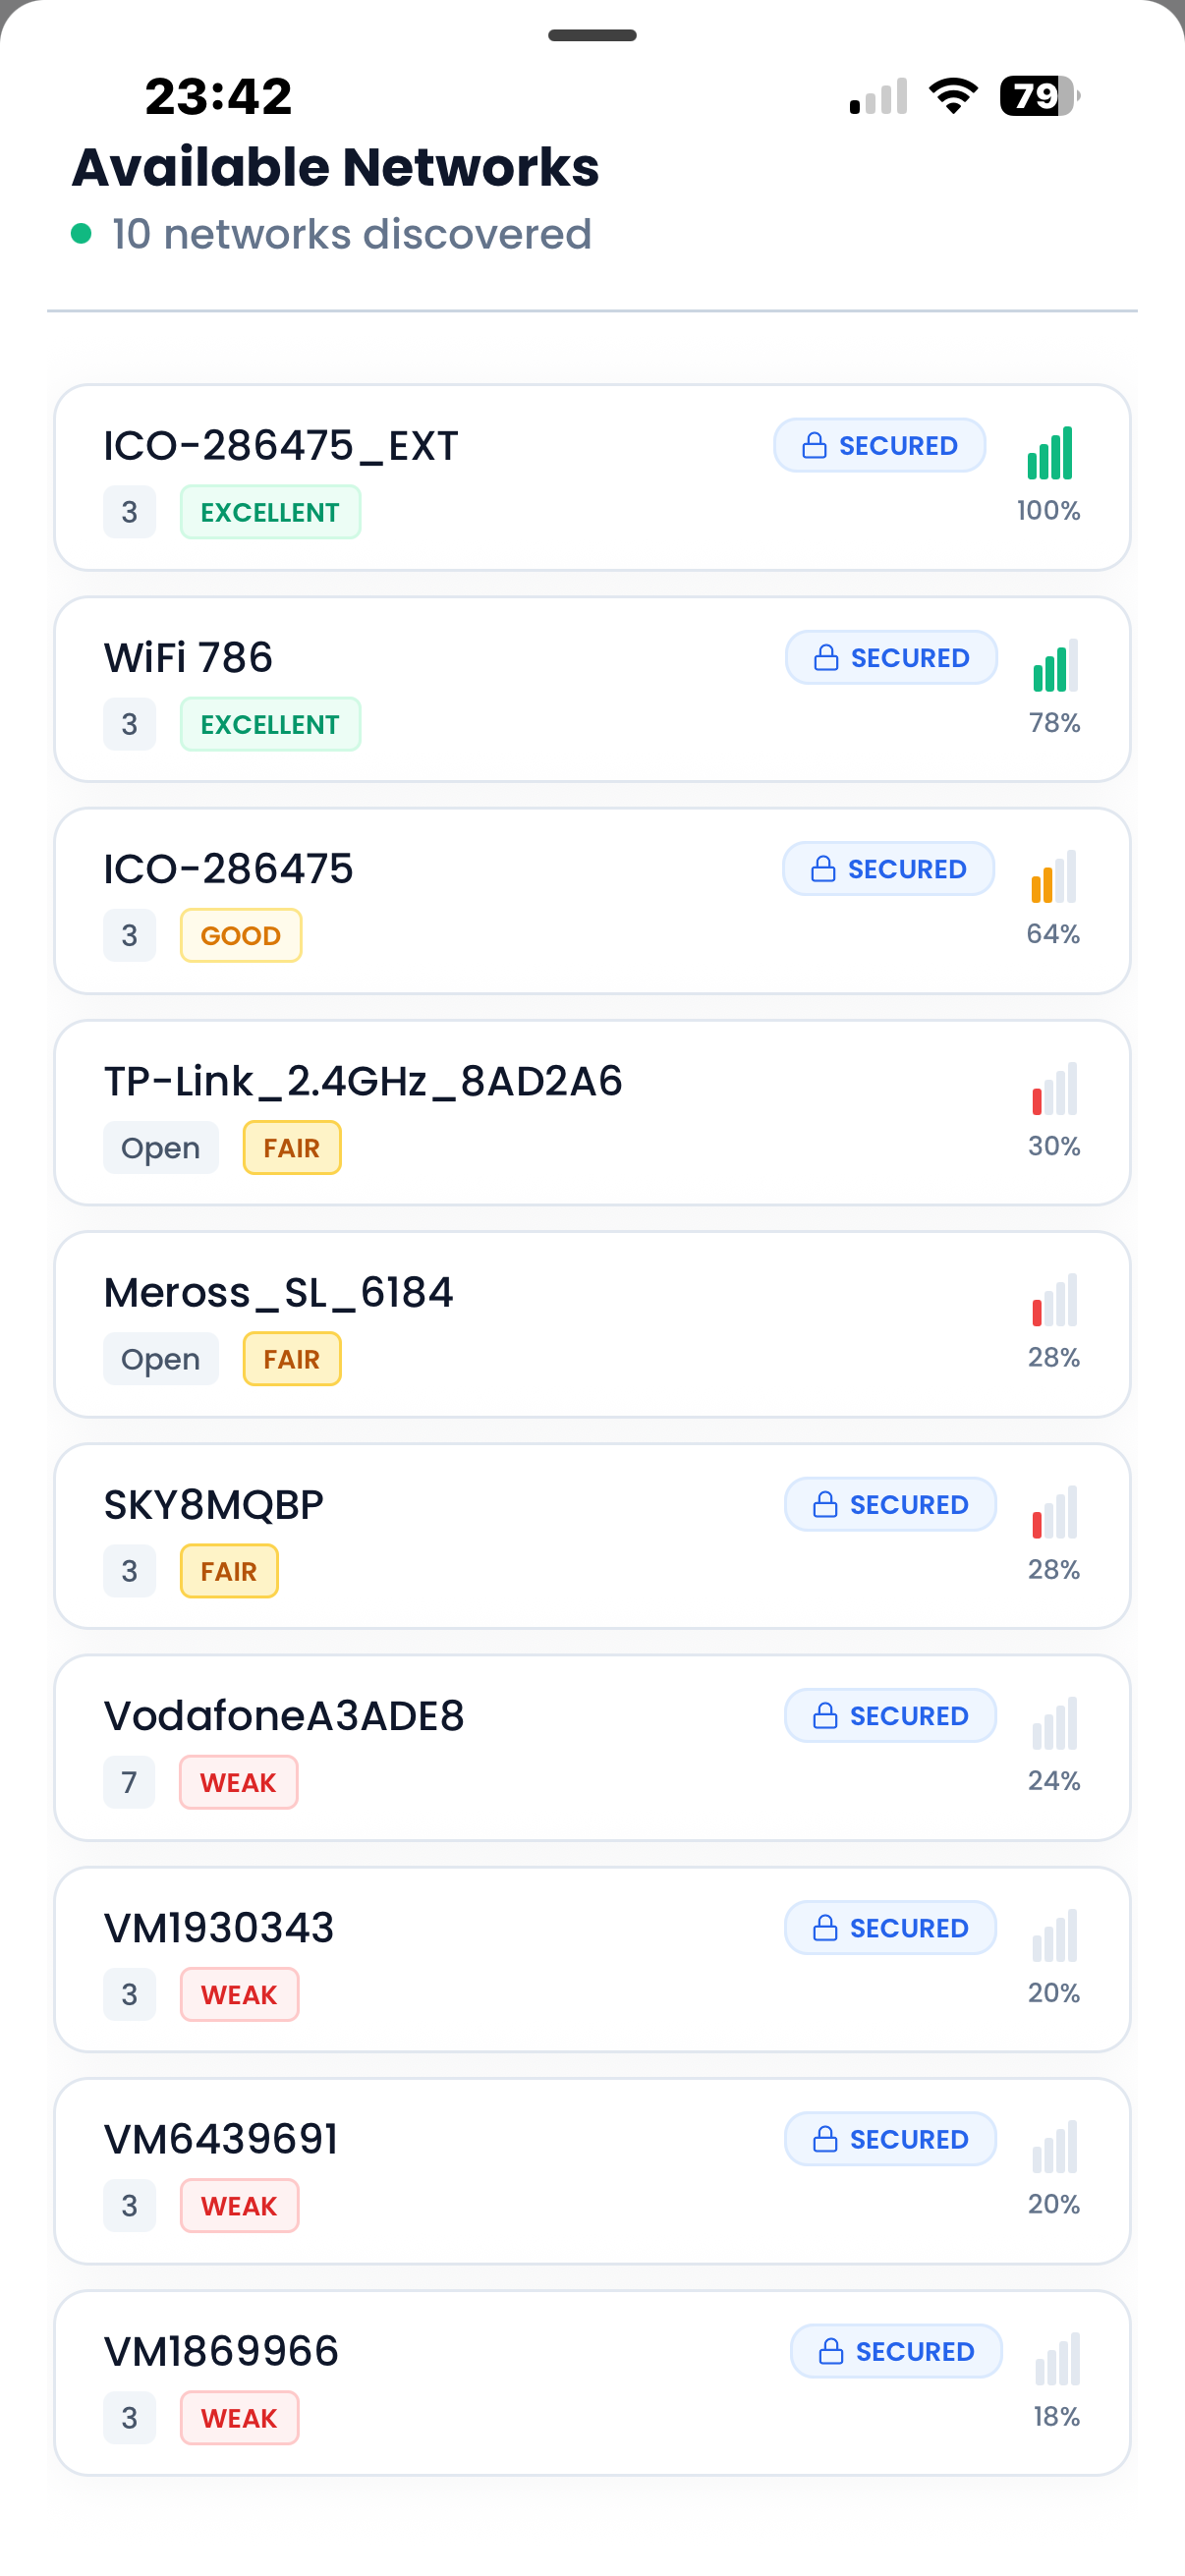
Step 10
Choose Wi-Fi Network
- Tap the required Wi-Fi from Available Networks list
- Prefer Good/Excellent signal strength
- Check signal bars before selecting
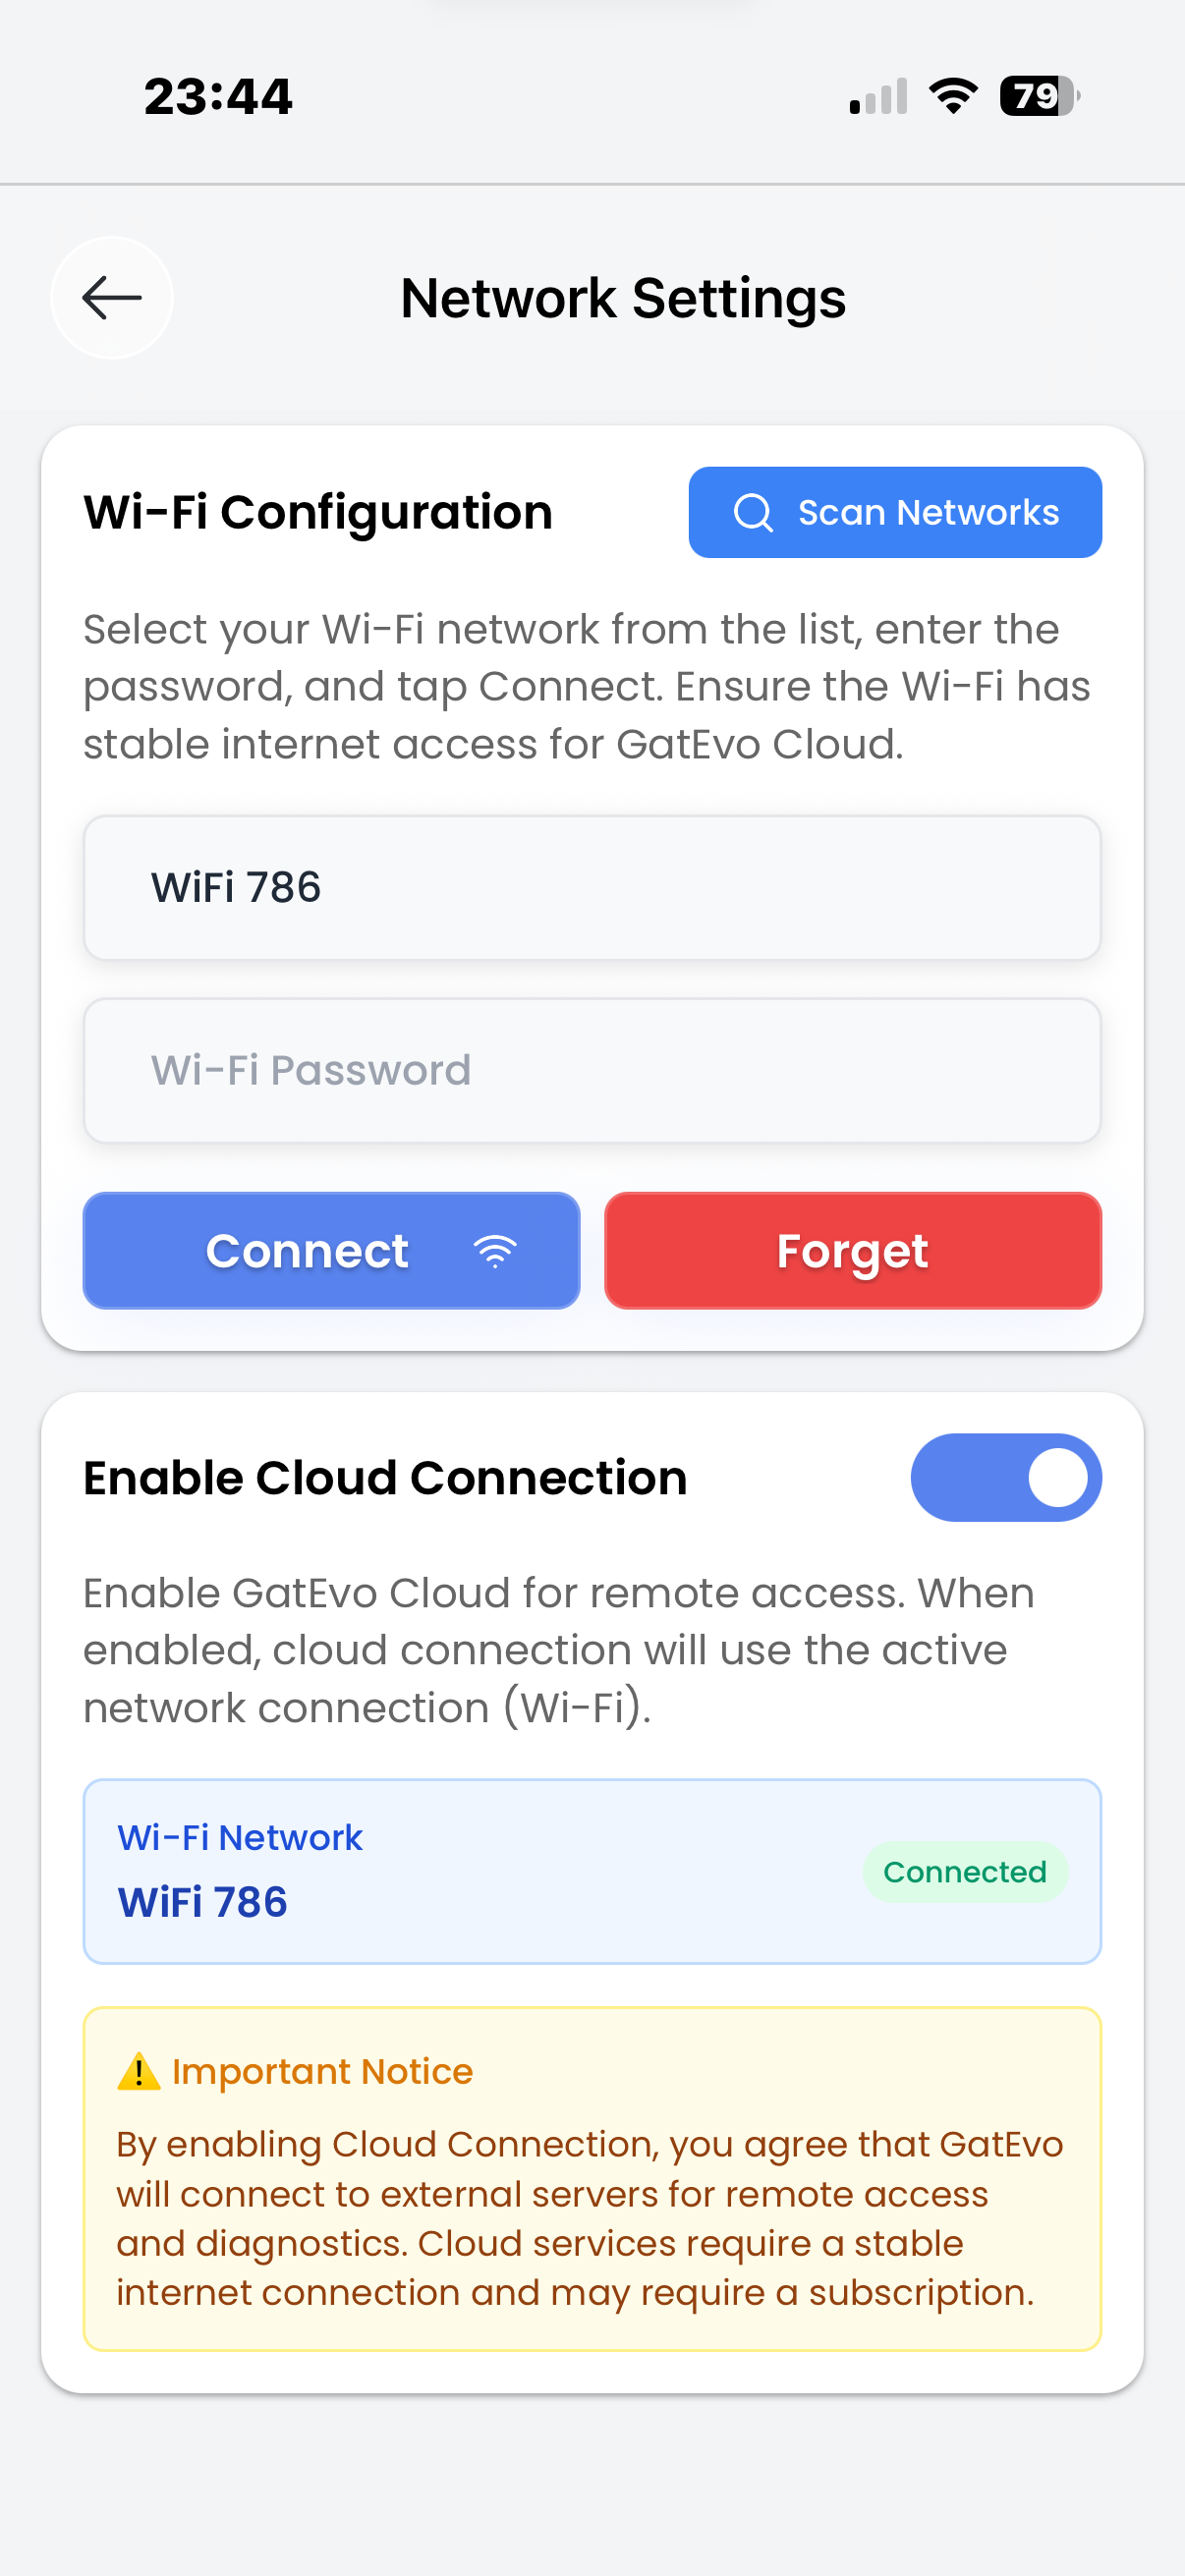
Step 11
Connect and Enable Cloud
- Enter the Wi-Fi password carefully and tap Connect
- Wait ~10 seconds for the connection to establish
- Toggle Enable Cloud Connection ON
- Accept the terms and conditions when prompted
Step 12
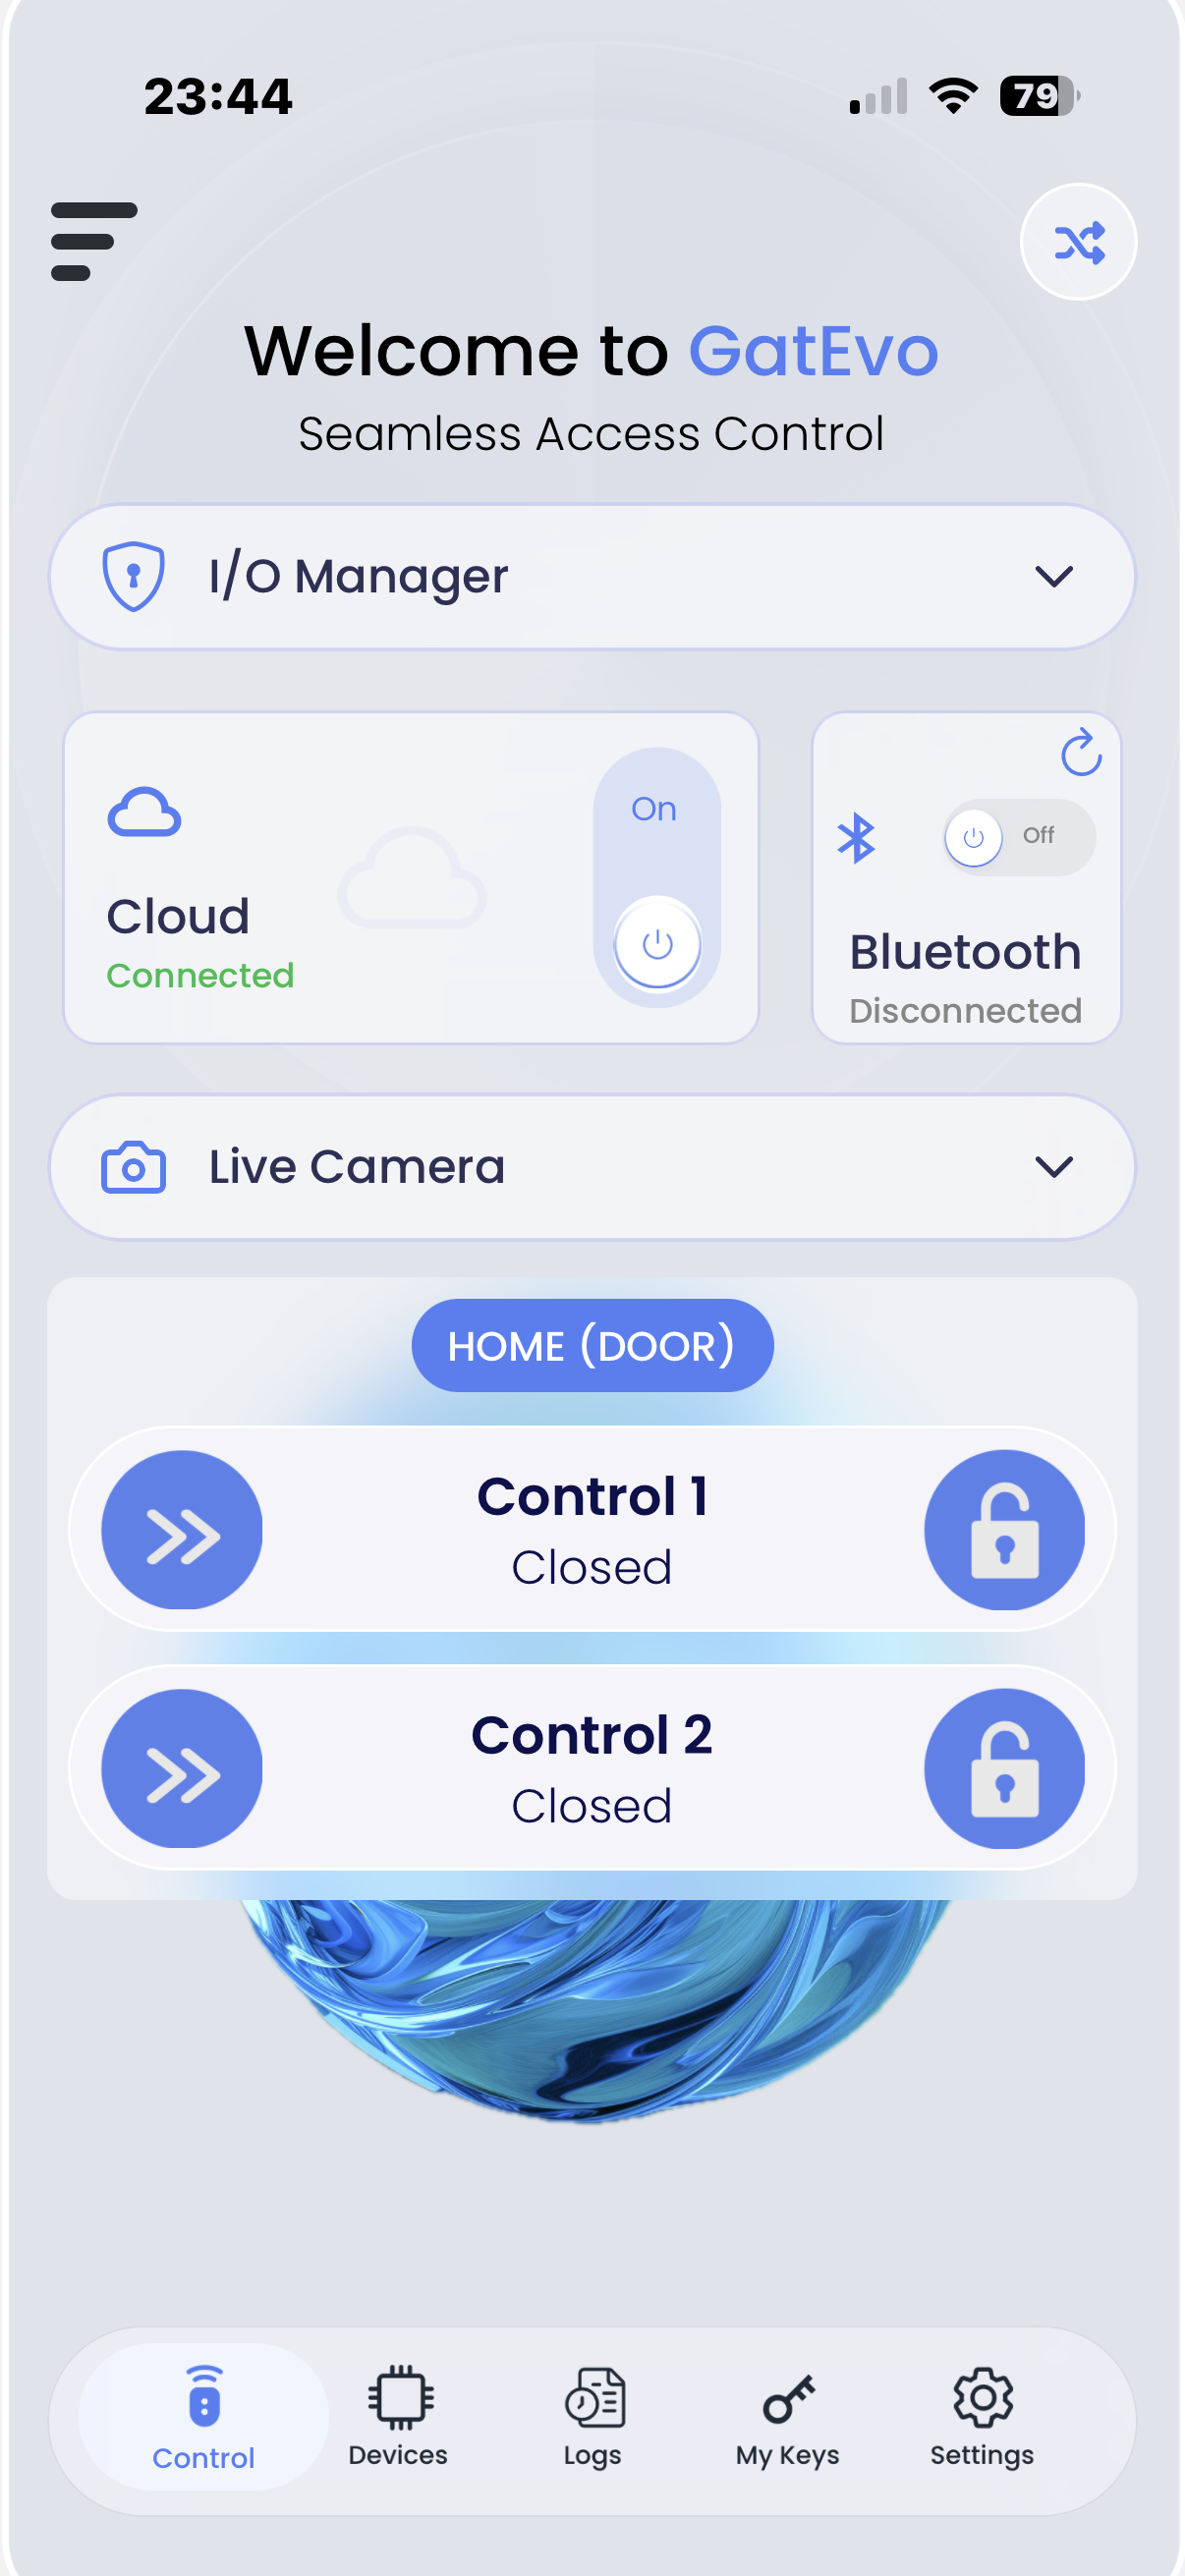
Enable Cloud Control
- Return to the Control screen
- Tap the Cloud power button to enable cloud control
- Confirm status shows "Cloud Connected"
- Setup complete — device is now cloud-enabled!
Installer Tips
Best Practices For A Smooth Setup Every Time
1
Test via Bluetooth first, then enable Cloud
2
ALWAYS do the iPhone Bluetooth OFF/ON refresh from Settings (NOT Control Center) on first setup
3
Use stable internet at the gate location for reliable cloud access
4
Bluetooth is mainly for setup and local servicing
5
Verify signal strength before selecting a Wi-Fi network
FAQ
Frequently Asked Questions
01.
Can GatEvo be installed inside a metal control panel?
Yes. Just use the external antenna ports for extended Wi-Fi/Bluetooth.
02.
How does it help with fault finding?
GatEvo Connect AI records full accurate input/output state diagnostics transparent logs accessible natively inside standard dashboards structure.
03.
Can it be used on commercial and residential gates?
Yes, absolutely logic configurations cover light-usage single-family frames or heavyweight high-output commercial entrances securely.
04.
Can the device integrate with lights and alarms?
Yes, triggers multiple linked outputs together covering sequential secondary scene triggers safety buffers natively.
05.
Do you provide leads to your approved installers?
Yes, verified engineers receive proximity-location support leads through straightforward transparent operator maps setups.
06.
Can I get training?
Yes, dedicated technician guide framing covering absolute configurations offset setup faithfully guides engineering frameworks natively.